Thursday, October 21, 2010

Pumpkin Beer Cupcakes with Maple Cream Cheese Frosting

Every fall, I get really excited for fall flavors. Anything involving butternut squash, apples, pumpkin, sweet potatoes, and/or warm spices will spark my interest. Currently I'm obsessed with Dunkin Donuts' Pumpkin Spice Coffee. However if we're going to talk alcoholic drinks, then we have to discuss pumpkin beer.

There are many pumpkin beers on the market nowadays and I have to say that my favorite is Jack's Pumpkin Ale. Of course it's also the most difficult pumpkin beer to find, in my opinion. I've been checking for weeks in the liquor stores but I haven't struck paydirt yet. So, on a whim I decided to purchase some Sam Adams Octoberfest beer. I had no idea what it tasted like, but I knew I liked Sam Adams so this couldn't be all bad. But I loved it.

I'm not very good at describing the flavor of beer because I only know whether I like it or not. However I will say this: It's very smooth. Kind of sweet. Not hoppy (I hate hoppy beers). The flavor isn't actually pumpkin, but it reminds me of pumpkin and pumpkin spices. If you want to know more, you're just going to have to get your own Sammy Octoberfest!

For the past two years, it's been my goal to make cupcakes using pumpkin beer. And this year I was finally able to make this dream a reality. I adapted a Honey and Beer Spice Cake recipe to make the cupcakes more seasonal. (The adaptation could have gone a little better, but we'll get to that later.) I also decided to top the cupcake with a maple-flavored cream cheese frosting because I hear pumpkin and maple flavors work really well together.


Pumpkin Beer Cupcakes with Maple Cream Cheese Frosting
cupcakes adapted from Joy the Baker's Honey and Beer Spice Cake
~30 cupcakes

  • 1 teaspoon cinnamon
  • 1 teaspoon all-spice
  • 3/4 teaspoon freshly ground nutmeg
  • 1/2 teaspoon ground cloves
  • 3 3/4 cups all-purpose flour
  • 1 teaspoon baking soda
  • 2 teaspoons baking powder
  • 1/2 teaspoon salt
  • 1 stick (4 ounces) unsalted butter, at room temperature
  • 1/2 cup sugar
  • 3/4 cup light brown sugar
  • 4 large eggs
  • 1 cup pumpkin puree
  • 12 ounces (1 1/2 cups) Sam Adams Octoberfest beer (or a similar seasonal beer)
1) Preheat oven to 350 degrees F.

2) Combine the cinnamon, all-spice, nutmeg and cloves in a small bowl or container.

3) In a medium bowl, whisk together the flour, baking soda, baking powder and salt together, then set aside.
4) Use an electric mixer to cream the butter for several minutes, until white and fluffy.
5) Beat in sugars and spices and mix for about 3 minutes. It will look grainy at first, but just keep beating.
6) Add the eggs one at a time, beating for ~1 minute after each addition.
7) Beat in the pumpkin puree.
8) Add the flour mixture in three additions and the beer in two additions. Alternate between adding the flour mixture and the beer. Beat after each addition.
9) Beat the batter on high speed for 30 seconds. The batter will be loose and smooth.

10) Pour the batter into cupcake liners and fill about 2/3 of the way.

11) Bake 18-20 minutes.

12) Let cool before frosting.

Maple Cream Cheese Frosting
slightly adapted from Smitten Kitchen's Maple Cream Cheese Frosting
  • 1 stick unsalted butter, room temperature
  • 2 8-ounce packages cream cheese, softened
  • 1/4 cup maple butter
  • 1/4 - 1/2 cup pure maple syrup
  • 2 1/2 cups confectioners’ sugar
1) Using a mixer, beat the butter for several minutes until white and fluffy.

2) Add cream cheese and beat until incorporated with the butter.

3) Add the maple butter and maple syrup and beat until incorporated.

4) Slowly add the confectioner's sugar. You can add more or less sugar depending on how sweet you like your frosting. Beat until fluffy.

5) Chill the frosting for about an hour or until it has set up enough to spread smoothly over the cupcakes.


OK, now comes the critique. I decided to be creative with this recipe and make some relatively big flavor changes. Unfortunately, I kind of forgot a few key things, such as,if I want to replace the honey in a recipe with something else, I should compensate for the loss of sweetness. Hmmm...that would be good advice.

Here are some of the changes I would make to my adapted recipes above:

- As I already hinted at above, the cupcake wasn't as sweet as I would have liked. In fact, the taste was pretty muffin-like. I would probably add another 1 cup of sugar to the cupcake batter to compensate for the loss of honey. I think using honey in the batter would make the cake a bit too moist. But that's just my personal preference. Use honey if you like.
- For my frosting, I thought that maple butter would give it a more robust maple flavor. Unfortunately this was not the case. I ran out of maple butter after using only 1/4 cup of it and had to resort to my roommate's maple syrup. I added another 1/4 - 1/2 cup of maple syrup so that the maple flavor would be pronounced enough. Next time I would probably just use a 1/2 - 3/4 cup maple syrup instead of using the maple butter.
- After taking a cupcake workshop this summer, I have a great desire to pipe my frostings whenever possible. I have yet to come up with a cream cheese frosting that's stiff enough to pipe. Even after refrigerating the frosting for about an hour, it wasn't stiff enough to pipe. I think this problem may have something to do with the cream cheese:butter ratio. Or maybe I needed to use more confectioners sugar. Any suggestions to help out with this recurring problem?

Otherwise, I really like the flavor and texture of the cupcakes (minus the need for more sugar). It was pretty light and fluffy and the pumpkin shone through. The frosting was creamy and allowed the maple flavor to seep into each bite of the cupcake. With some minor adjustments, this could be perfect.

Sunday, October 10, 2010

Lump Crab Po' Boy

As I was prowling the Tastespotting website, I stumbled upon a recipe for a Lump Crab Po'Boy. First of all, I was intrigued by the picture because it was gorgeous and I love me some good food porn. (Warning: this blog's pic is nicer than my po' boy pictures, but I'll explain why in a bit). Second of all, the website that was boasting this fine food specimen is called Unsportswomanlike Conduct. Each week (or every other week) she makes food that is inspired by a football team. The week she made the Lump Crab Po' Boy, she had the New Orleans Saints in mind. I can't really tell if she likes the Pittsburgh Steelers or not, but I wonder if she'll ever make a Primanti Bros. sandwich...Is there a suggestion box available?


Lump Crab Po' Boy
adapted from Unsportswomanlike Conduct
makes 2-3 sandwiches
  • 12-16 oz super lump crab meat (you can also use jumbo lump crab meat if you like, but super lump is fine as well -- and cheaper!)
  • 1 tbsp creole seasoning (I used Emeril's Original Essence, but any creole seasoning will do)
  • ~1/4 cup mayonnaise
  • ~2 tbsp ketchup
  • 1 tbsp worcestershire sauce
  • 1 shallot, diced finely
  • 1 tsp garlic, diced finely
  • 1 1/2 tsp lemon juice
  • squirt of dijon mustard
  • ~1/4 tsp paprika
  • ~1/4 tsp cayenne pepper
  • salt and pepper to taste
  • 2-3 Sourdough loaves
1) Prepare the crab: Toss the crab with the creole seasoning.

2) Prepare the remoulade sauce: Combine the remaining ingredients. Mix well.


3) Prepare the sandwich:
a. Slice the sourdough loaves 3/4 of the way through, making a pocket for the crab and remoulade sauce.
b. Add some remoulade sauce in the bread "pocket".
c. Stuff with seasoned crab meat.
d. Add more remoulade sauce on top of the crab meat.

The bread provided a bit of a crunch, along with a chewy texture. This was a nice contrast to the creamy, spicy crab and the remoulade sauce. Lettuce and tomatoes would increase the "crunchiness factor" and also add an element of freshness to this sandwich, but I was traveling and didn't have any, so I sucked it up. You can add them to your own sandwich when you make this recipe. Also, since I was traveling, the only camera I had on hand was my point and shoot, which takes OK-quality pictures. So there's the reason my "after" pictures aren't that great.

But this could be the simplest recipe to date! One of the things I loved about this recipe is that just about anything can be substituted in the crab mixture or the remoulade sauce. If you want to add some other spices to the crab, or if you love mayonnaise then my all means go wild. So feel free to modify the recipe to your heart's content. It's all about what you like, so make sure to make it your own.

Saturday, October 2, 2010

Muttar Paneer - Attempt #1


This is a beautiful plate of food. I've been loving eating and making Indian food this year. I've also been wanting to step out of my Paneer Makhani comfort zone. One of the Indian dishes that I really wanted to make was Muttar Paneer (sometimes called Mattar Paneer or Matar Paneer...I don't know what the difference is, but the dish itself is the same). I had an extra package of paneer in the fridge so this was even more inspiration to make the Muttar Paneer as soon as possible.

I stumbled upon Nigella Lawson's Muttar Paneer recipe on the Food Network website. I love Nigella Lawson mostly because it seems that she's always talking about chocolate. I don't know if this is true but every time I see her on television or read about her in a book, there seems to be a chocolate reference involved. And that's all right with me. Additionally, the Muttar Paneer picture on the website was gorgeous. So I figured I'd take the recipe and run with it.

Muttar Paneer
slightly adapted from Nigella Lawson's recipe
  • 1/2 cup vegetable oil
  • 14 ounces paneer, cut into bite sized cubes
  • 1 onion, roughly chopped
  • 2 cloves garlic, roughly chopped
  • 1-inch piece ginger, roughly chopped
  • 1 cup water
  • salt
  • 1 teaspoon turmeric
  • 1 teaspoon garam masala
  • 2 (10-ounce) packets frozen peas
  • 1 teaspoon tomato puree
  • dash of habanero sauce
  • 1 cup chicken stock (you can substitute vegetable stock if you like)

1) Heat the oil a large skillet and add the paneer cubes, in several batches, and fry until they are golden. The oil WILL splatter, so be careful. (You can also dry fry the paneer cubes in the pan sans oil, but I haven't tried this. This is Nigella's suggestion.)

2) Remove the golden cubes and rest on a paper towels to absorb excess oil.

3) Pour all but ~2 tablespoons of the oil out of the pan.

4) Put the onion, garlic cloves, ginger and water into a blender (or food processor) and blend to a pulp.

5) Fry gently for about 5 minutes with a sprinkling of salt. Stir in the garam masala and turmeric and cook for another 2 minutes before adding the still frozen peas.

6) Dissolve the tomato puree and habanero sauce in the chicken stock and pour over the contents of the pan.

7) Stir again and turn the heat down to low, cover and cook for 15 minutes, tasting to ensure that the peas are tender.

8) Add the paneer cubes. Stir to incorporate. Allow the paneer to warm through.

9) Serve over rice or naan. (I used brown rice.)


Unfortunately, there's a reason that this post is labeled "...Attempt 1". I liked it, but I wasn't completely in love with it. It had just about every element I enjoy about this dish when I order it from an Indian restaurant:

- The sauce was spicy.
- The peas were sweet and they pop in your mouth as you begin eating them.
- The paneer was firm and slightly crispy due to the frying.

But overall something was missing. I think it has to do with the lack of spices in the recipe. Don't get me wrong, the dish was "spicy", as in there's some heat from the habanero sauce. However, there just isn't the same spice profile that I would get when i order this from Taste of India down the street. So, I'm definitely going to try again. I've started to drink the Muttar Paneer Kool-Aid and so I must must must find another recipe to make!

If you try this recipe and tweak the spices (or anything else), let me know what you do and how it turns out!

Sunday, September 26, 2010

Edamame Hummus

Over the past few years, I've discovered something that many Americans have known for a while. Edamame is good!

For those of you not already in the know, edamame is a soybean. It's most commonly eaten as an appetizer of sorts. It comes in a green pod and is usually dusted with salt, then served warm. To eat, hold one end of the pod, pop the other end in your mouth and pull it back out hrough your teeth to release the beans. Simple, right?

I've eaten a lot of edamame since we've been introduced. And now I've discovered another way to dive into this soybean: Hummus. More specifically: Edamame Hummus.

Hummus is a Middle Eastern dip that is typically made with chickpeas. Chickpeas are one of the two types of beans that I can stand to be around. Edamame is the second. But I recently stumbled across the idea of making an edamame hummus. I'm not sure where I first saw such an idea. Undoubtedly it was on the interweb somewhere. I searched for some recipes and found a relatively simple one on Life's Ambrosia's blog. I immediately bookmarked the recipe for later use.

Now it's "later"! Why does that statement sound like "Now and Later", the fabulous taffy candy from my childhood. I think they still sell them. Apple's my favorite flavor, if you want to get me a belated birthday gift.

Digressing...

OK, back on track. Edamame hummus. Let's get to the recipe.

Edamame Hummus
recipe from Life's Ambrosia
  • 1 1/2 cup shelled edamame
  • 1/4 cup water
  • 3 teaspoons lemon juice
  • 1 garlic clove
  • 2 tbsps tahini (sesame paste)
  • 1 tsp soy sauce
  • 2 – 3 tablespoons olive oil
  • salt to taste
1) Cook the edamame according to package directions. Allow to cool for about 10 minutes.

2) Combine the edamame, water, lemon juice, garlic, tahini, and soy sauce in a food processor and process until well blended.

3) With food processor running, slowly drizzle in olive oil. The amount of olive oil you add depends on how smooth/chunky you like your hummus.

4) Taste test the hummus and add salt as necessary.

This hummus was smooth and creamy. It had a nice salty flavor from the soy sauce and the additional salt, yet it was refreshing as a result of the lemon juice. I could taste the flavor of the edamame even though it was a bit subdued by the tahini. That was fine with me even though it makes this hummus taste more like a traditional hummus that is made with chickpeas. If you want the dip to taste more like edamame, you can decrease the amount of tahini you use. Another option is to nix the tahini altogether and just use sesame oil. I discovered this trick during my search on the web. Unfortunately, I don't remember where I saw it, but you can do a Google search. It's out there somewhere.

I dipped just about everything in this hummus. I used baby carrots, celery, mushrooms, crackers, etc. It's a great afternoon snack that's pretty healthy as well. Although it might not be so healthy to sit down and eat almost half of this dip in one sitting, which I somehow managed to do. You might want to show a bit more restraint than I did.

Wednesday, September 22, 2010

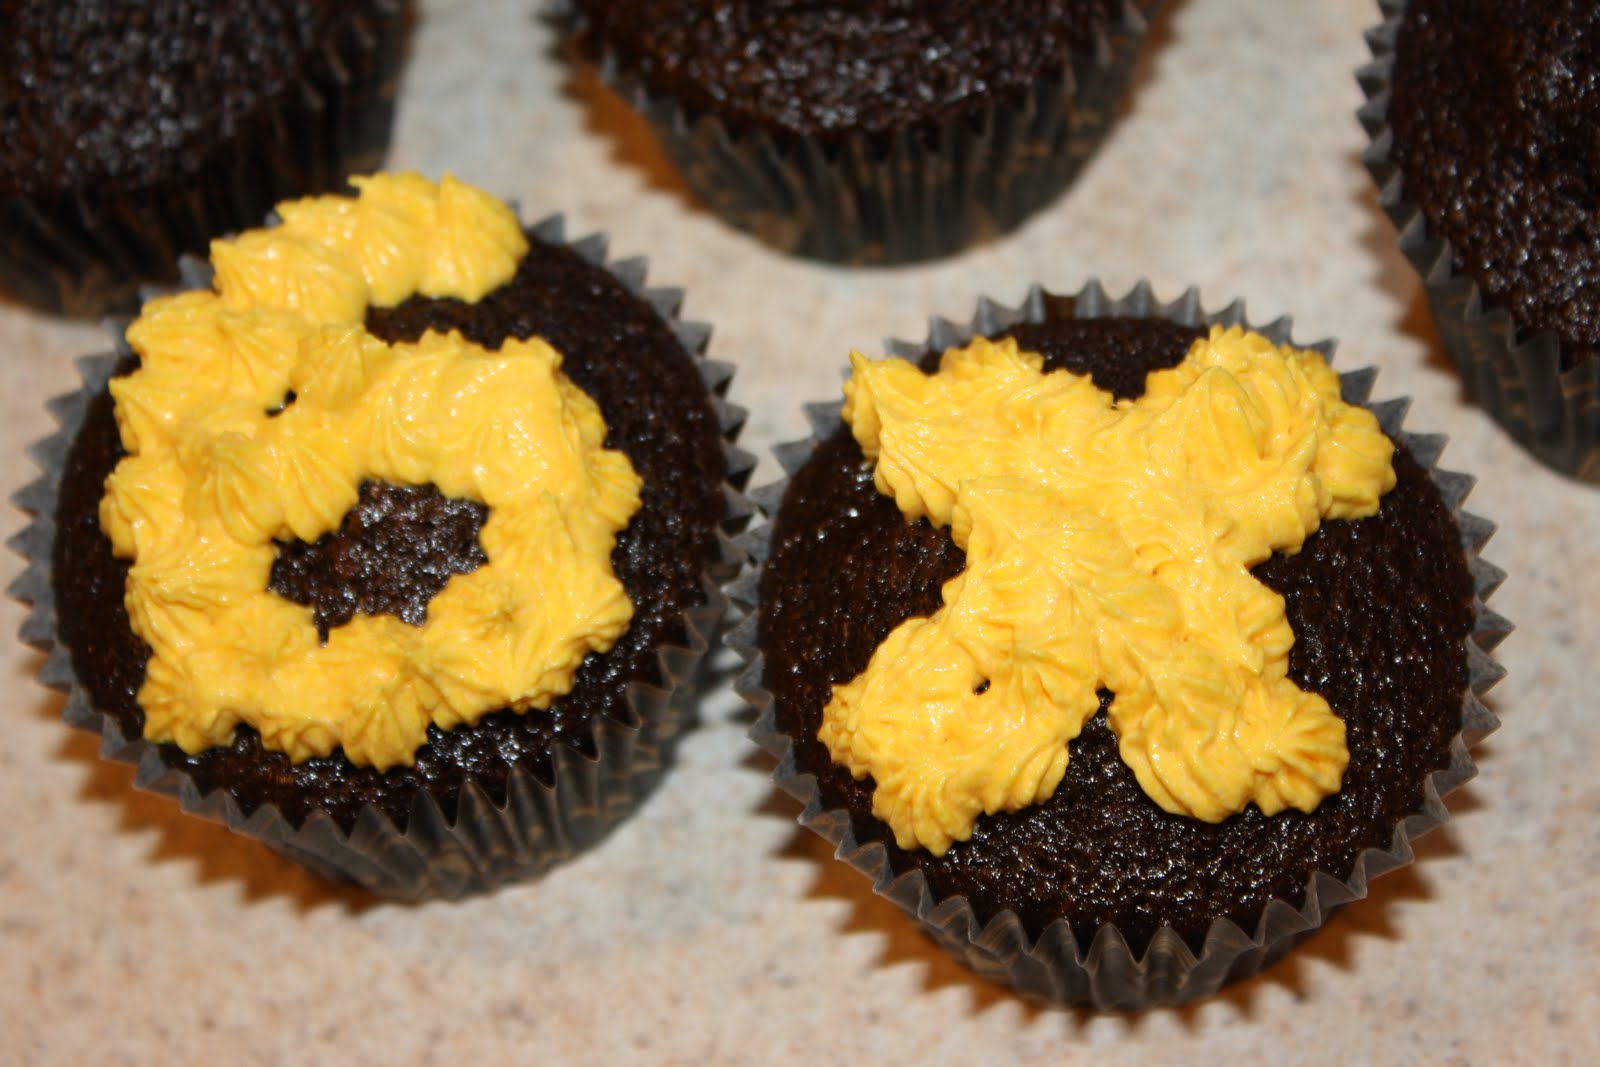
Chocolate Buttery Nipple Cupcakes (aka Steelers Cupcakes!)


For those of you who don't know, I'm a huge, HUGE Pittsburgh Steelers fan. And yes, that's a football team. I've been a fan for years now and as last year's football season rolled around I began thinking about making Steelers-inspired cupcakes. Unfortunately, this was around the time that the Steelers were on a 5-game losing streak so I lost motivation pretty quickly.

Well now it's 2010 and the Steelers are not sucking so I figured it was probably wise to make these cupcakes as early in the season as possible. Somewhere around the same time, I got a hankering for a drink that I haven't had since college. A Buttery Nipple. It's not the most PC name, but hey, you gotta be over 21 to have a drink, right? (18 if you're in the Bahamas...orrrr you at least need to be tall enough to reach the bar.) So hopefully you can handle the word "nipple". A Buttery Nipple is a drink which consists of a 1:1 ratio of Bailey's Irish Cream (which I believe could be one of the nectar of the gods) and Butterscotch Schnapps. Enjoy chilled over a few ice cubes. But let's get back to talking about cupcakes.

Since the Steelers' colors are black and gold, I decided to make a chocolate cupcake with a goldish-yellow frosting. Since my tried and true recipe for chocolate cupcakes comes from Hershey's I decided to stick with a sure thing. The frosting for the cupcakes is already relatively pale as-is, so I picked up some yellow food coloring and tossed that suckerin. Seriously, I stopped counting drops after I reached 30.

HERSHEY'S "Perfectly Chocolate" Chocolate Cake
(makes ~24 cupcakes)

  • 2 cups sugar
  • 1-3/4 cups all-purpose flour
  • 3/4 cup HERSHEY'S Cocoa
  • 1-1/2 teaspoons baking powder
  • 1-1/2 teaspoons baking soda
  • 1 teaspoon salt
  • 2 eggs
  • 1 cup milk
  • 1/2 cup vegetable oil
  • 2 teaspoons vanilla extract
  • 1 cup boiling water
1) Heat oven to 350°F. Line muffin cups (2-1/2 inches in diameter) with paper bake cups.

2) Add eggs, milk, oil and vanilla in mixing bowl.

3) In another bowl, stir together sugar, flour, cocoa, baking powder, baking soda and salt.

4) With the mixer on medium speed, gradually add the dry ingredients to the wet ingredients in several increments. Mix ingredients together for another 2 minutes to blend completely.

5) Stir in boiling water. The batter will be thin.

6) Pour batter into cupcake liners. Fill cups 2/3 full with batter.

7) Bake 22 to 25 minutes. Cool completely. Frost with Buttery Nipple Frosting (recipe below).


Buttery Nipple Frosting
adapted from Smitten Kitchen's Bailey's frosting
  • 4 - 5 cups confections sugar
  • 2 sticks (1 cup or 8 ounces) unsalted butter, at room temperature
  • 3 tbsps Baileys Irish Cream
  • 3 tbsps Butterscotch Schnapps
  • yellow food coloring (optional if you're not a Steelers fan)
Note: I actually doubled this recipe so I would have enough frosting to pipe onto the cupcakes. If you're planning on spreading the frosting onto your cupcakes, you can cut this recipe in half.

1) Whip the butter using an electric or hand mixer for several minutes. You want the butter to look almost white and be very light and fluffy.

2) Slowly add the powdered sugar, a few tablespoons at a time. Slowly.
3) When the frosting is thick, drizzle in the Baileys and Butterscotch schnapps. Whip until combined. If the frosting is too thin at this point, add another spoonful or two of powdered sugar.
4) Add yellow food coloring, if desired. For those Steeler fans out there: I really did add over 30 drops of yellow food coloring to get the perfect Steeler gold.
5) Pipe or spread on the cupcakes.
As you can see, I chose to pipe the frosting onto the cupcakes. The choice decoration consisted of the letters S-T-E-E-L-E-R-S and 6-X (the Steelers have won the Superbowl 6 times which is kind of a big deal since no other NFL team has ever done that). Then there were some extra cupcakes on which I just practiced using that darn star tip.
Let's discuss the taste of these boozy cupcakes. I love the chocolate cake, first of all. The recipe calls for oil, so it has the perfect level of moist-ness and the Hershey's chocolate makes it super chocolate-y. The frosting is smooth and most definitely reminds me of downing a Buttery Nipple drink. I guess "eating" would be more appropriate? In any case, you should try this out! I also took the liberty of taking copious amount of pictures which you can find below with comments. Enjoy!

The 6X cupcakes
Spell it out! (Don't mind that bottle of tonic in the background.)
The Steelers cupcakes - all packed up and ready to head to the Steelers bar
How about a closeup?
Star tip practice
Made it to the bar safely. Surrounded by Terrible Towels and Steeler cars.

Friday, September 10, 2010

Vanilla Bean Mini Donuts

My friend Diego sent me a recipe for baked mini donuts via Twitter a few weeks ago. (Yes, I accept recipe suggestions through Twitter. Welcome to the year 2010.) The recipe was from Heather at Sprinkles Bakes and these donuts are just soooo cute that I knew I had to make them myself. An added advantage to making something mini-style is that you can eat 15 of them and not feel guilty about it. At least until you get that nasty stomachache an hour later.

The only thing stopping me now was the fact that I didn't have a mini donut pan. Which. I. Couldn't. Find. Anywhere. How is it that no major retail stores on the East Coast sell mini donut pans? OK, I confess that I didn't search that hard. Eventually I caved and purchased a pan online at Amazon.com. It was pretty cheap and as soon as the pan came in the mail and I saw how small it was, I realized that I had made a costly mistake. The pan itself was great. But I had purchased only 1 pan. For the sake of your own sanity, I urge you to purchase at least 2 mini donut pans. 3 would be best, since this recipe yields about 5 dozen donuts.

Vanilla Bean Mini Donuts
recipe from Heather at Sprinkles Bakes
yields ~5 dozen donuts

  • 2 cups all purpose flour, sifted
  • 3/4 cup granulated sugar
  • 2 tsp. baking powder
  • 1/2 tsp. salt
  • 3/4 cup buttermilk*
  • 1 tsp. vanilla extract
  • 2 eggs, lightly beaten
  • 2 tbsp. butter, melted
  • Seeds from one vanilla bean
* You can make your own buttermilk by adding 1 tbsp of lemon juice to 1 cup of milk. Let the mixture stand for 5-10 minutes so that it curdles, then use the amount required.

1) Preheat oven to 425°F. Lightly spray the donut pan with nonstick cooking spray.

2) In a large bowl, sift together all purpose flour, sugar, baking powder and salt.

3) Add the buttermilk, eggs, vanilla extract, vanilla seeds and butter. Beat until just combined.

4) Fill each donut mold approximately 1/2 full.

5) Bake ~5 minutes or until the top of the donuts spring back when touched.

6) Let cool in pan for another 5 minutes before removing and topping with vanilla glaze.


Vanilla Glaze
  • 1 cup confectioner’ s sugar
  • ~ 1/4 cup milk**
  • 1/2 tsp vanilla extract
  • several drops of liquid food coloring, if using any
** Add the milk slowly as you may need more or less of the milk, depending on how thin you want your glaze.

1) In a small bowl, stir together sugar, milk and vanilla extract until the sugar is completely dissolved.

2) Add food coloring, if using any, and stir until color is uniform.

3) Dip donuts in glaze immediately. Sprinkle on any nonpareils immediately after, as the glaze will become firm over time.

As mentioned in Heather's blog, I put the donut batter in a piping bag to help speed the donut pan-filling process. Best advice ever. Of course, after I was done, I realized that there was nonstick cooking spray all over the kitchen counters and the floor. Unfortunately this is a side effect of making numerous batches of mini donuts. On the positive side, this recipe was really easy to whip together, but as I mentioned earlier, the baking process was tedious with only 1 pan.

So, about those donuts. It really hurts my soul to say this, but I wasn't bowled over by them. The vanilla flavor shone through, but the texture of the donuts was a little dry and rubbery. I also think the dough/batter could also have used another 1/4 cup of sugar.

Well, there will be another attempt in the future. Perhaps I will find another recipe to use. I will not be conquered by the baked donut. But maybe I'll order another donut pan before I get to all that conquering.

Monday, September 6, 2010

Lobster Arugula Sauce

Have I mentioned yet that Giada De Laurentiis is my hero? If I could, I would make just about every recipe she's created. At least the ones that don't call for olives. I'm not a huge fan of them.

So as I was watching Giada at Home last week, I saw her making an appetizer called Bruschetta with Shrimp, Tarragon and Arugula. I was intrigued by the idea and of course by the images of the resulting food. Now, my roommate and I don't really host many events, which means that we don't actually need to create many appetizers. All the same, I vowed that this limitation would not stop me from recreating this dish for myself. I'd just have to tweak it a bit.

First of all, since this recipe is already tomato based, I decided that instead of slathering it on pieces of toasted bread as an appetizer, I could toss it with some cooked pasta as a sauce.

Secondly, I have done some experimentation over the past year or so and I realize that I'm not a great fan of shrimp. I always expect to be blown away by it, but I'm typically left feeling let down. Sorry to all you shrimp lovers out there, but it has to be cut out of this recipe. The most decadent seafood in my opinion is lobster. I eat a lot of it at home in the Bahamas, but I'd never actually made it myself before. I guess there's no time like the present...

Lobster Arugula Sauce
adapted from recipe by Giada De Laurentiis
  • ~1 lb lobster meat*
  • Old Bay seasoning
  • 3 tbsps olive oil
  • 1 large or 2 small shallots, chopped
  • 2 cloves garlic, chopped
  • salt and black pepper
  • 6 Roma tomatoes, chopped
  • 1/4 cup red wine
  • 1/4 cup chicken stock
  • 1 tbsp chopped fresh basil leaves
  • 2 tbsp chopped fresh oregano leaves
  • 1 packed cup arugula, chopped
  • 1/2 cup mascarpone cheese, at room temperature
Boil the Lobster:

* You can use live lobster or frozen lobster for this dish. I chose to use frozen lobster tails which I thawed overnight in the refrigerator.

1) Bring a large pot of water to a boil and season with a clove of garlic, a few dashes of Old Bay seasoning, and a generous pinch of salt.

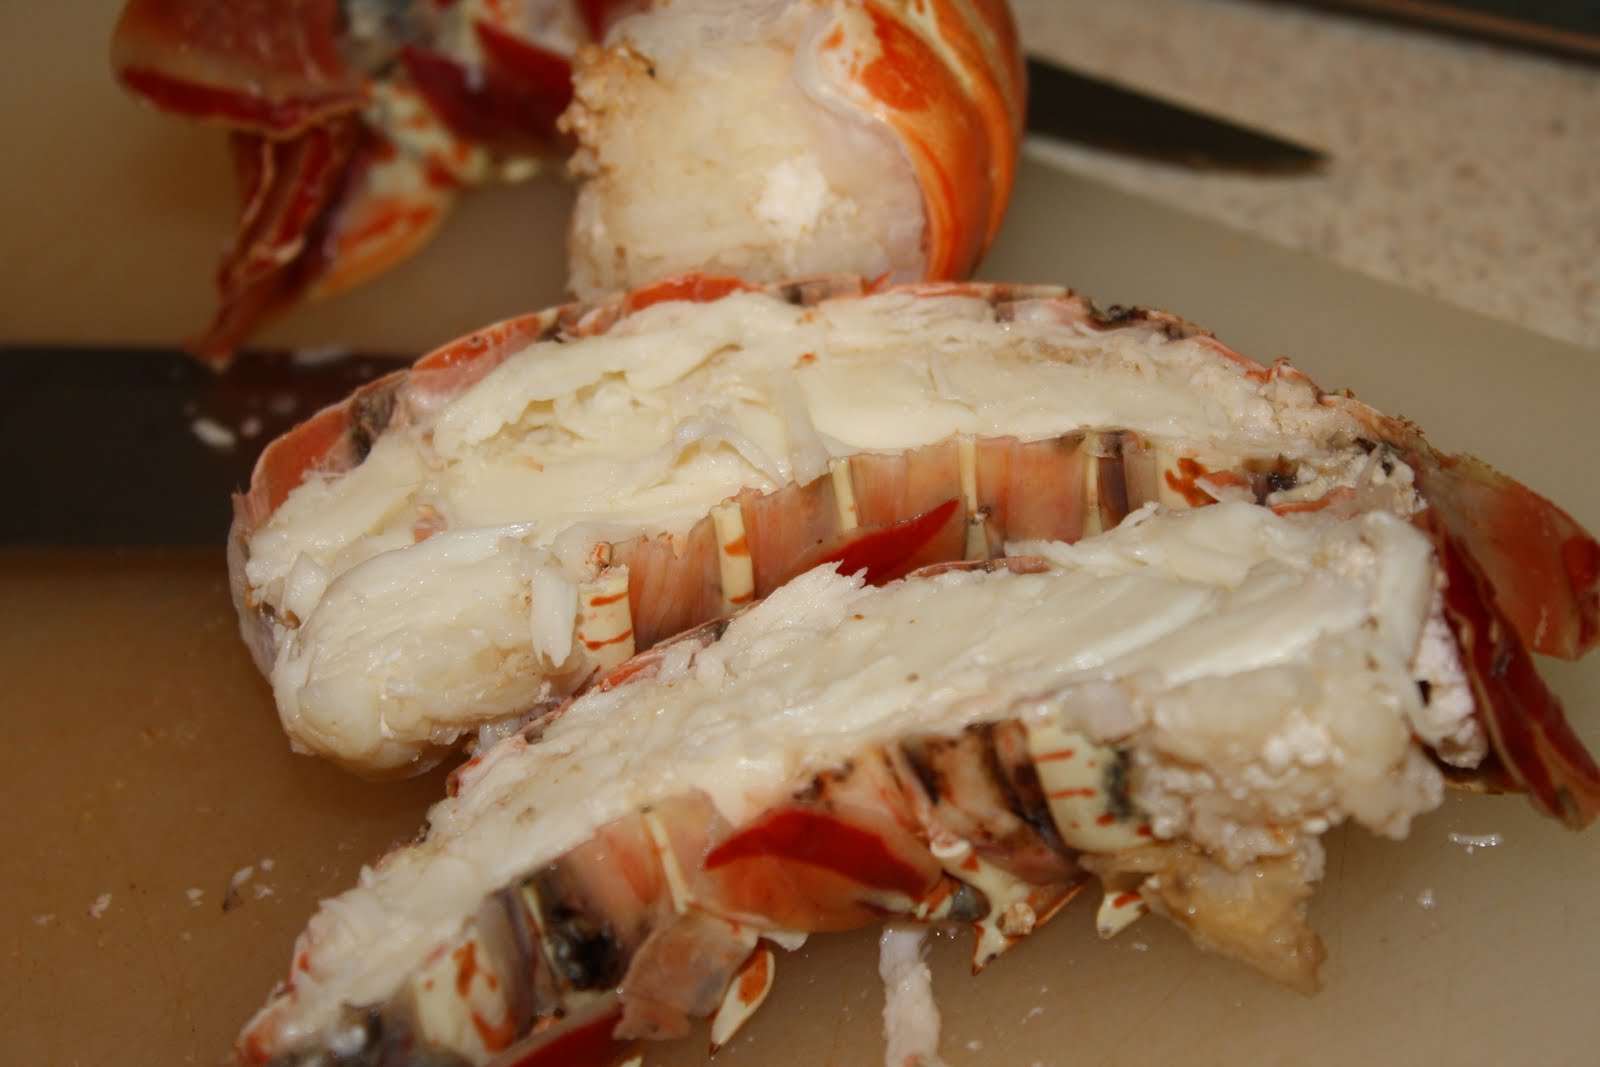
2) Drop the lobsters in the water. (I boiled my lobsters for approximately 6 minutes, but I would recommend boiling for only 4-5 minutes.)

3) Use tongs to remove the lobsters from the water and let cool for a few minutes.

4) Pull the lobster meat out of the shell, taking care not to get any of the shell stuck in the meat.

5) Chop the meat into 1/2 inch pieces.


Make the Sauce:

1) In a medium skillet, heat 3 tablespoons of oil over medium heat.

2) Add the shallots and garlic and saute for about 2 minutes, stirring constantly.

3) Add the tomatoes and season with salt and pepper, to taste.

4) Cook over medium-high heat until the tomatoes are soft, about 8 minutes.

5) Add the wine and scrape up any brown bits that may be clinging to the bottom of the pan with a wooden spoon. Cook for 2 minutes.

6) Stir in the stock and cook for another 2 minutes.

7) Remove the pan from the heat and add the basil, oregano, arugula, mascarpone cheese, and lobster**.

8) Stir until the mixture is creamy, then season with salt and pepper to taste.

9) Serve over a bowl of pasta.

**Since I had cooked my lobster all the way through by accident, I didn't actually add the lobster to the sauce because I didn't want to overcook it. If I had cooked the lobster for less time, then I would have tossed it in to the sauce when the sauce came off the heat.

I layered this sauce over fresh spinach pasta and got down to the best part of having this blog: the taste test. The best word to describe this dish is "obscene". That's a positive adjective, by the way. The first thing that hits your senses is the smell of the fresh herbs. The oregano provides a spicy and slightly smoky aroma. Because the sauce isn't pureed, there are small chunks of meaty tomatoes that are slightly sweet and slightly tart. The lobster meat is smooth and creamy, which works quite well with the creamy mascarpone cheese that I used to finish the dish. Pure heaven.

Now excuse me while I go back for seconds...