Sunday, July 24, 2011

Baked Tilapia with a Tomato-Feta Sauce

It's hot in New York.  Yeah, I know, I live in New Jersey.  Guess what? New Jersey's hot too.

In times like these, it's best to stick to eating some form of ice cream.  Unfortunately, since I've been really busy in the last few months and also started working out 3-4 days a week, I've discovered (the hard way, of course) that I should probably eat something with at least a smidgen of nutritional value on a somewhat regular basis.

I remembered that Kevin over at Closet Cooking had made a tasty-looking fish dish on his blog a while ago.  A light fish dish is exactly what I needed to counteract the heaviness of the weather.  I'd never made anything with fish before either, so this would be a new challenge for me.


Baked Tilapia with a Tomato-Feta Sauce

Serves 4-6


  • 5 filets of tilapia (~1 1/2 lbs of fish)
  • 1 tablespoon olive oil
  • 1 onion, diced
  • 2 cloves garlic, chopped
  • habanero sauce (or chili pepper flakes), to taste
  • 1/4 cup white wine (I used Riesling)
  • 2 14.5 oz cans diced tomatoes
  • 1 teaspoon dried oregano
  • 1/4 cup dill, chopped
  • 1/2 cup feta, crumbled
  • salt and pepper to taste
  • lemon juice to taste

1. Heat the oil in a pan over medium heat.


2. Saute the onion for 5-7 minutes, or until tender.

3. Add the garlic and habanero sauce and saute for another minute.


4. Pour in the white wine and simmer for 5 minutes.

5. Add the tomatoes and oregano.  Simmer for about 15 minutes or until the sauce just starts to thicken.  (Tip: You may want to begin preheating the oven at this point.)


6. Remove the sauce from heat and add the herbs, feta and season with salt and pepper to taste.


7. Lightly spray a baking dish and place the tilapia in the dish.


8. Pour the sauce over the fish fillets.

9. Bake in a preheated 350 degree F oven until the fish is cooked, about 20 - 25 minutes*. The cod will be cooked when it flakes easily and it is no longer translucent.

*The original recipe states that the fish should be cooked in 10-12 minutes.  My fish was definitely not cooked until about 25 minutes had passed.  And no, it wasn't dry after that amount of time in the oven, either.  I would suggest starting to check on the fish after 10 minutes and periodically thereafter, until it's cooked through.

10. Sprinkle with lemon juice to taste.


I never knew that cooking with fish would be so easy.  Since this is all new territory for me, I'm pretty proud of it.  The fish turned out to tender and flaky and the sauce was fresh and light, but slightly tart.  I think I was a little heavy-handed with the dill so I would cut back on that the next time I make this.  If you love dill, then go for it.  I personally have a great relationship with feta cheese so I would double up on that next time.

Sunday, July 17, 2011

Almond Cupcakes with Boozy Almond Frosting


Each month, I typically obsess for a few days about what kind of cupcakes I'm going to make.  This month was no different.  First, I thought amaretto cupcakes.  Then I realized that I don't drink amaretto.  And there's already too much odd liquor around this apartment without me adding more.  

Next, my roommate and I brainstormed some Independence Day themes.  And I promptly realized that I had already executed our top two picks: some sort of apple-flavored cupcakes or berry cupcakes.

Determined not to give up, we next thought that I could make a fruity daiquiri cupcake (think strawberry daiquiri).  I confess that I don't really like fresh fruit.  I think the fruit knows this because each time I try to incorporate it into a cupcake, things don't turn out exactly as planned.  You know how some people have a "black thumb" instead of a "green thumb" when it comes to gardening?  Well, I have a "black thumb" when it comes to fruity cupcakes.  I can't seem to make them both look AND taste great.  If I'm lucky, I'll get them to look OR taste great.  But that's as far as I've gotten. So after a few more days of thought, I nixed the daiquiri cupcake idea.

I looked at a few more recipes, but in the end this month's cupcake flavor was determined by several key factors: 1) my lack of free time to make cupcakes; 2) trying to adapt to the lack of time by using ingredients I already had on hand; 3) my constant desire to make almond cupcakes.  Note how my desire to make these cupcakes comes after the convenience of making these cupcakes.  Don't get me wrong.  I actually have been wanting to make almond cupcakes for a really long time, but I kept getting caught up in more elaborate cupcake ideas.  There's something to be said about making a simple(ish) cupcake.

So almond cupcakes it was.  And of course, what would a TBK cupcake be if it didn't have alcohol in the frosting?  As I stated above, my roommate and I seem to have a large supply of alcohol that we never drink.  We get these odd liquors and liqueurs at one of the two parties we have each year.  These beverages tend to just hang around until the next party, when someone may finish a bottle or two.  But that doesn't matter because by the end of the night, more bottles of alcohol that we won't drink will show up.  It's a vicious, never-ending cycle.

Almond Cupcakes
slightly adapted from Smithalicious
yields ~24 cupcakes

Print Recipe
  • 3/4 cup butter
  • 1 1/2 cups sugar
  • 2 eggs
  • 1 1/2 teaspoons almond extract
  • 1/2 teaspoon vanilla extract
  • 2 1/2 cups + 5 tablespoons cake flour
  • 2 1/2 teaspoons baking powder
  • 1/4 teaspoon salt
  • 1 1/4 cups milk

1) Preheat oven to 375 degrees F.  Fill cupcake tins with liners.

2) Sift (or whisk!) the cake flour, baking powder and salt in a large bowl.

3) In another bowl, cream the butter at medium speed for several minutes until smooth and almost white in color.

4) Mix in the sugar and beat until combined.

5) Add the eggs and beat until the batter is smooth.

6) Slowly add the dry ingredients which were mixed together earlier.  Beat the batter until smooth.

7) Fill cupcake liners about 2/3 full and bake 20-22 minutes or until a toothpick inserted in the centers comes out clean.  I recommend rotating the cupcakes halfway through so they'll bake more evenly.


Boozy Almond Frosting
slightly adapted from Smitten Kitchen's Bailey's frosting
  • 2 sticks (1 cup) unsalted butter, at room temperature
  • 4 - 5 cups confections sugar
  • 1 teaspoon almond extract
  • 2 tablespoons Godiva liqueur
  • 1 tablespoon Bailey's Irish Cream
  • 24 drops blue food coloring (optional)
  • 8 drops green food coloring (optional)

1) Whip the butter using an electric or hand mixer for several minutes. You want the butter to look almost white and be very light and fluffy.

2) Slowly add the powdered sugar, a few tablespoons at a time. Slowly.

3) When the frosting is thick, add the almond extract, Godiva, and Bailey's. Whip until combined. If the frosting is too thin at this point, add another spoonful or two of powdered sugar.

4) Add food coloring, if desired.

5) Pipe or spread on the cupcakes.

For the frosting, I first decided to make an almond and Godiva-flavored frosting.  Almond and chocolate flavors go great together, right?  Well, in actuality I really didn't care for it.  So how do you fix this?  Bailey's.  Bailey's fixes everything.  It's like duct tape for frosting.  Yum!

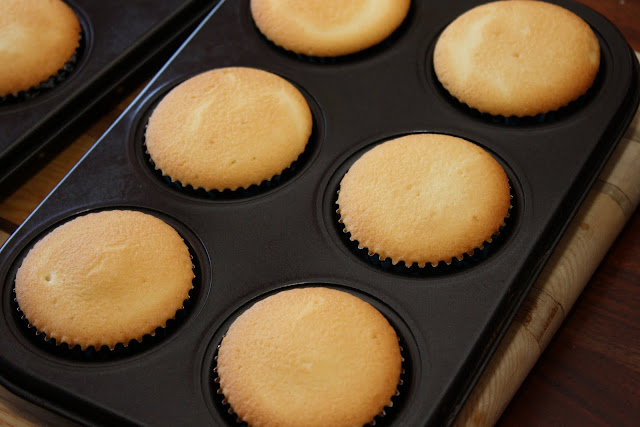
The cake turned out light and slightly crumbly, but still moist.  The frosting was a smooth mix of the almond and Bailey's flavors.  I don't think I really needed the Godiva in there, but the flavor wasn't prominent at all.  If I were to make the frosting again, I would just leave out the Godiva.  I made the frosting a bright Tiffany blue because I liked the color, but also because the un-tinted frosting was an unattractive tan color.  Obviously you can make the frosting whichever color you like.  Overall, this was a cupcake success!

Irrelevant side note: Interestingly enough, when I took these cupcakes to work, no one picked up on the boozy frosting.  Am I working with drunks?

Sunday, July 3, 2011

Zucchini Bread with Dried Cranberries & Almonds


As a part of my "I need to clean up all these Food Network Magazines lying around my room" effort, I've been finding some new recipes.  Well, really they're old recipes since they were published months, if not years, ago.  But I'm just re-discovering them, so I'll say they're new.  I'm ripping them out of the magazines so that I can have a recipe stash to dig into in the future.  You know, for that day when I win the lottery, quit my job, and eat massive amounts of food all day long.

I'm digressing...

One of the recipes that I had forgotten about isn't really a recipe.  It's more like those Mad Lib games that we used to play as kids.  If you don't know what I'm talking about, don't tell me.  Just go here and check it out.  Food Network Magazine has a Mix & Match section that allows you to choose a variety of ingredients and customize your own dish based on your preferences.  The article that I stumbled across was for a Quick Bread.  I had wanted to make a version of this quick bread since I first saw the article a few months ago, but of course time ran away from me and I forgot about all about it.  The particular combination that I was looking forward to making was a zucchini bread with cranberries and almonds.  Awesomeness.

Zucchini Bread with Dried Cranberries & Almonds
recipe adapted from Food Network Magazine, May 2011

  • 1 cup grated zucchini, squeezed dry (~2 small zucchinis)
  • 1 cup dried cranberries, chopped
  • 3/4 cup toasted slivered almonds*
  • 3/4 teaspoon salt
  • 1 1/4 cups flour
  • 3/4 cup sugar
  • 1 teaspoon baking powder
  • 1/2 teaspoon baking soda
  • 1/2 teaspoon cinnamon
  • 1/2 teaspoon nutmeg
  • 2 eggs
  • 1/2 cup cooled melted butter (or vegetable oil)
  • 1/2 cup greek yogurt (or plain yogurt or sour cream)
  • 1 teaspoon vanilla extract
* I toasted my slivered almonds in a 400 degrees F oven for only 2 minutes.  If your almonds aren't slivered, they may be able to be toasted longer, but make sure to watch them.  They can go from "fine" to "burned" in seconds.

1) Preheat the oven to 350 degrees F.  Lightly butter or spray a 9" x 5" loaf pan with cooking spray.

2) Mix the dry ingredients in a large bowl: cranberries, almonds, salt, flour, sugar, baking powder, baking soda, cinnamon, and nutmeg.

3) Whisk the wet ingredients together in another large bowl: eggs, melted butter, greek yogurt, and vanilla extract.

4) Stir the zucchini into the wet ingredients.

5) Fold the dry ingredients into the wet ingredients until just combined.

6) Pour the batter into the loaf pan and bake for 45 minutes or until a toothpick inserted in the center comes out clean.

7) Cool the bread in the pan for 30 minutes, then remove the bread to cool completely before adding the glaze.


Vanilla Glaze
recipe adapted from Food Network Magazine, May 2011
  • 1 cup confectioner's sugar
  • ~2 tablespoons milk
  • 1/4 tsp vanilla extract
1) Whisk together all ingredients until combined and no lumps are visible in the glaze.  (You may need to add more or less milk to get the consistency you want.)

2) Pour the glaze over the cooled bread and allow to set for 15-20 minutes.


This thing smelled so good while baking that I barely restrained myself from slicing into it before it was cooled and the glaze was set.  Why does "quick bread" still take so long? When I was finally able to dig into the bread, I found that it was several things all at once.  There was a tangy taste with each bite because of the cranberries.  The bread was sweet because of the vanilla glaze.  And it was hearty because of the zucchini and the almonds.  I couldn't really taste the zucchini very much in the bread, but I think this it's one of those ingredients which is similar in nature to salt where you won't miss it until it's not there.  I thought the bread ended up being closer in nature to a cake, rather than an actual bread, but if you're more interested in something savory, the simple solution is to leave off the glaze.

Friday, July 1, 2011

Butternut Squash Risotto


Butternut squash risotto just so happens to be one of the first dishes that I ever made myself.  I'm not exactly sure why I chose a dish that I wasn't very familiar with at the time.  In fact, that was the first time I had ever tasted risotto.  Luckily, I did good.  So I decided that after a 2 year butternut squash risotto hiatus, it was time to revisit the recipe.

It also couldn't hurt that I had some extra butternut squash puree hanging out in the freezer for a while and I had some arborio rice in the cupboard that I wanted to use up. (Note: I have made other risottos recently.  I haven't had this arborio rice in my cupboard for 2 years!)

I mean, what's not to like about a mixture of butternut squash, leeks, and arborio rice?

Butternut Squash Risotto
serves 6-8

  • 2 cups roasted butternut squash puree
  • 6-8 cups chicken stock
  • 2 cups arborio rice
  • 3 medium leeks
  • 2 tablespoons extra-virgin olive oil
  • 2 tablespoons butter
  • 1 cup Castellano cheese, grated (can substitute Parmesan or Manchego cheese)
  • splash lemon juice
  • salt & pepper, to taste

1) In a medium pot, heat the chicken stock to a simmer.

2) Dice the leeks and soak them in cold water to remove as much dirt as possible.

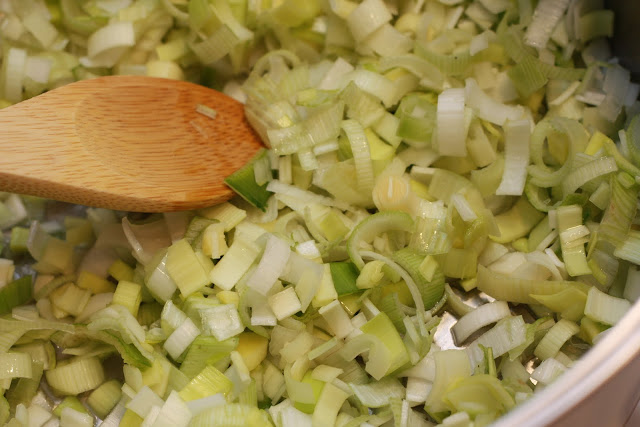
3) In a large saucepan, melt the butter and olive oil together.  Add the leeks and saute for a few minutes, until tender and translucent.

4) Add the rice and stir to incorporate.  Once the rice has cooked for a few minutes, add a splash of lemon juice and stir until absorbed.

5) Add 1 - 2 cups of simmering stock.  Once the first addition of stock is absorbed, add another 1 - 2 cups of stock until that is absorbed.  Continue adding stock until the rice is creamy and tender, but slightly firm. (I ended up using about 6 cups of stock, but probably could have used up to 7 cups.  You may prefer to use more or less.)

6) Turn off the stove.  Stir in the butternut squash puree, cheese, and salt and pepper to taste.


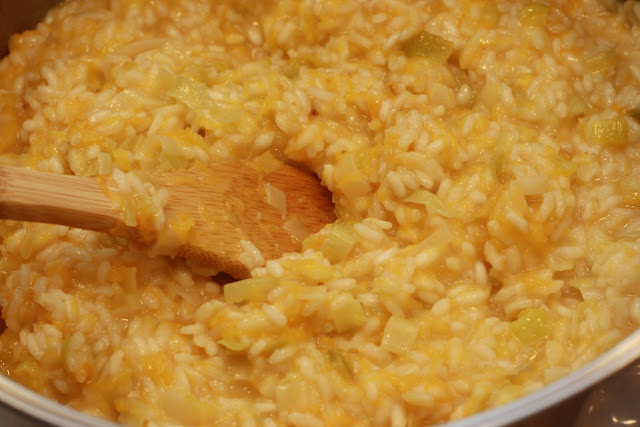
The risotto turned out creamy and cheesy, which happens to be just the way that I like it.  When I first made this risotto, I used chunks of butternut squash.  This time, I decided to use butternut squash puree since that's what I had on hand.  I definitely prefer the risotto with the pureed squash, since it blends well with the consistency of the risotto.  I was also able to taste the squash in each and every bite, which is something that doesn't always happen if you use squash chunks in the risotto.  I really liked the leeks in this dish as well, since they're heartier than a regular onion and stand up well to the other aspects of this dish.

(If you don't have leeks available, you can still use regular onions.  I won't tell!)