Monday, December 26, 2011

How To De-Seed A Pomegranate


Did you know that it's pomegranate season?  Why yes, it is.

I've always loved pomegranates, but this year I really got a hankering to nosh on those tart little addictive seeds (a.k.a. arils).

Did you know that you can purchase these tiny arils in convenient packages in select grocery stores?

Did you also know that they will cost you an arm and a leg?

Yeah.  About that...


Tuesday, December 20, 2011

Asparagus Spinach Quiche


This is a fact: I haven't made a quiche in over a year.

What?  I love quiches.  What is happening to me?

In order to get back on track, I revisited my list of quiche recipes in my arsenal.  (Yes, I call my Bookmarks folder an arsenal.  Don't worry about it.)  I quickly found a Closet Cooking recipe for an asparagus spinach quiche.  I've been a fan of Kevin's blog for a while now and my family and I have made quite a few recipes of his, so I knew that this quiche would not disappoint.  What's not to love about asparagus, spinach, and lots and lots of cheese? Yes, I can get behind this.

Friday, December 16, 2011

Ferrero Rocher Cupcakes


I know I just posted a dessert recipe the other day and now I'm following up with another sweet dessert.  But it's OK.  You're so going to love these ones.  Because they're holiday cupcakes...

Ferrero Rocher Cupcakes.

Wow, right?  Yeah, that's what I think too.  If you're not familiar with Ferrero Rocher, you could simply search the candy aisle for the only spherical, gold-foil-covered candy you can find.  Once you unwrap the foil, you're left with a ball of chocolate hazelnut goodness.  You just want to hug everybody in sight when you eat it.  It's that good.

So once I stumbled across a Ferrero Rocher cupcake recipe from Cupcake Project, I knew that I needed to make these.

Do you need my justification spelled out?  OK, here's why: 
1. I have a love affair with chocolate.
2. I adore a good chocolate hazelnut combination.(Think Nutella. Come on!)
3. These cupcakes have a filled center.  'Nuff said.
3. I am entranced by pretty shiny things.  Ferrero Rocher chocolates pretty much have that market covered.

Monday, December 12, 2011

Salted Caramel Popcorn Pretzel Clusters


Can you seriously say the title of this blog post 3 times fast?  Because I have trouble saying it right the first time and I was the one who (sort of) made this name up.

These clusters actually started out as bars.  You know those really convenient square/rectangle things that give you a bite or two of pure goodness?  Well, that's what I was aiming for.  Clearly things fell a little short.  The good news is that the taste did not suffer at all. Since this dessert was still quite delicious and only lacked the ability to stick together, I whipped out some cupcake liners and separated the sweet into individual portions.

I took these to my friend's brunch party over the weekend and they were a hit.  I'm usually known for my cupcakes, but these treats did not disappoint the crowd.

Tuesday, December 6, 2011

Mussels in a White Wine Sauce


I really wasn't a fan of mussels until I took a term abroad trip to France during high school.  My classmate and I ate dinner with our host family each night and this meal consisted of whatever our host mom decided to cook that day.  One night she came to the table with a huge bowl of mussels.  I had never tried them before, but since it's sort of frowned upon to turn down the main course, I tentatively placed a few mussels on my plate and tested it out.  And I liked it.

Ever since, I tend to go through stages where I crave nothing but a substantial serving of mussels.  I don't know why, but I roll with it.  Recently I got that craving again.  Unfortunately, things never seemed to work out and I would always miss out on those mussels.

After a few weeks of this, it finally dawned on me that I should just make a big ol' pot of mussels myself.  Why was I waiting to go to a restaurant for this deliciousness?  So let's do it.

Monday, November 28, 2011

Roasted Apples


I have a great idea.

My mom came to visit me a few weeks ago and we went apple-picking.  She went a little overboard, as this was her first apple-picking experience.  15lbs of apples later, this was quite apparent.  And then Mom left the next day to head back to The Bahamas, sans apples.

This got me thinking.

You know how apple pie recipes always call for "cups" of apples?  Well, how am I supposed to know how many apples will yield 6 cups? This inevitably leads to that moment in the grocery store when I hog the spot in front of the Granny Smith apples while trying to figure out how many apples equal 6 cups.  Awkward.  Then there's always at least an apple or two left over that I have to deal with.

So here's my great idea.  Why not roast those extra apples up and treat yourself to a fresh, homemade apple pie without the crust?  Some people say the crust is the best part (and I concur), but sometimes you just do what you gotta do.


Wednesday, November 23, 2011

Pumpkin Spice Latte Cupcakes with Whiskey Espresso Frosting


It's November.  It's Thanksgiving-time.  This means that I have been slurping on Dunkin Donuts' pumpkin spice coffee approximately 3-4 times per week since the end of September.  I'm not sure exactly why it took me forever to put two-and-two together and realize that the flavors of one of my favorite beverages should be recreated in cupcake form.  I'm only slightly disappointed in myself.

OK, I'm over it.

When my neighbor informed me that he was once again holding his epic pre-Thanksgiving Deep Fried Turkey party, I knew exactly where I could debut these cupcakes.  Yep, right amongst the deep-fried turkey, deep-fried ravioli, deep-fried risotto balls, deep-fried onion rings...Do you see where this is going?  This would be an excellent chaser for all that excellent fried food.

Saturday, November 19, 2011

Red Onion Pasta with Spicy Zucchini-Tomato Sauce


Let's be honest.  We all crave pasta.  Who doesn't?  (Pssst...if you don't, you should.)  And even though I just gave you some pasta sauce earlier this week, I just had to hit you with this.  This is some amazing spaghetti sauce that I need to put in your face.

OK, not really in your face. Because that would be weird.  Weird and not so nice.  And I want this to be a nice, welcoming blog space for you.  Let's just say that you would want to put your face in it.

Wait, that's odd too.  This conversation is getting awkward and heading in the wrong direction.

Instead, let's think about fresh crisp zucchini and earthy tomatoes tossed with ever-so-slightly-spicy red onion pasta.  Yes, now this is heading in the right direction.

Monday, November 14, 2011

Bolognese Sauce


I recently joined a new club.  It's a not-so-secret club called the Secret Recipe Club.

Here's the deal.  Once you join, you're randomly assigned another person's food blog.  From that blog, you need to choose one recipe to make or adapt to your liking. One.  Only one! There are so many recipes to choose from out there, I wasn't sure how I'd do it.

For my first month as a part of the club, I was assigned the Living Lou blog.  I was surprised to learn that Lou is an 18 year old who's infatuated with everything having to do with food.  Let's see.  When I was 18, I'm pretty sure I was only concerned with consuming whatever food was within reach.  And I definitely was not interested in making it.  Clearly Lou's got her life together already.  I'm still working on that.  Let's not talk about it.

What really matters is Lou's food blog.  On her website, she has several recipes that caught my eye, but the one that finally won me over was the recipe for Bolognese Sauce.  This was the perfect choice for me for two reasons:
1. I've been thinking about making a Bolognese sauce for months; and
2. I purchased a ton of pasta recently from Flour City Pasta and obviously needed to make more pasta sauce.

I made a few adjustments to Lou's recipe, but I rarely ever leave a good recipe alone.  You must know that by now.


Bolognese Sauce
adapted from Living Lou's recipe 
makes 8-10 servings

  • 1 lb ground turkey (or ground chicken)
  • 1 lb ground pork
  • 1 onion, chopped roughly
  • 1 red bell pepper, chopped roughly
  • 1 carrot, chopped roughly
  • handful (~3 tablespoons) basil, julienned
  • 2 cloves garlic, minced
  • 1 28oz can crushed tomatoes
  • 1 5.5oz can tomato paste
  • 1 tsp salt
  • habanero sauce, to taste
  • 1 1/2 tablespoons dried oregano
  • 1/4 teaspoon nutmeg
  • 1/4 teaspoon celery seed
  • 1/4 cup milk
  • black pepper, to taste

1) Add the onion, red bell pepper, and carrot into a food processor and pulse several times until vegetables are desired size.  (You can choose to chop them by hand, but this is much easier.)


2) Meanwhile, heat a drizzle of olive oil in a large pot and add all the ground meat.

3) Once the meat is done, add the chopped vegetables and the basil to the pan.  Cook the mixture for about 3 minutes.

4) Toss in the garlic and cook for another minute.

5) Stir in the tomato paste and cook for about a minute.

6) Pour in the crushed tomatoes and stir to combine the sauce.

7) Sprinkle in the salt, habanero, and the spices (oregano, nutmeg, celery seed). Stir.

8) Simmer the sauce for about 45 minutes so the flavors have a chance to blend together.

9) Pour in the milk and stir to combine.  Add black pepper to taste.

10) Toss with pasta and serve.

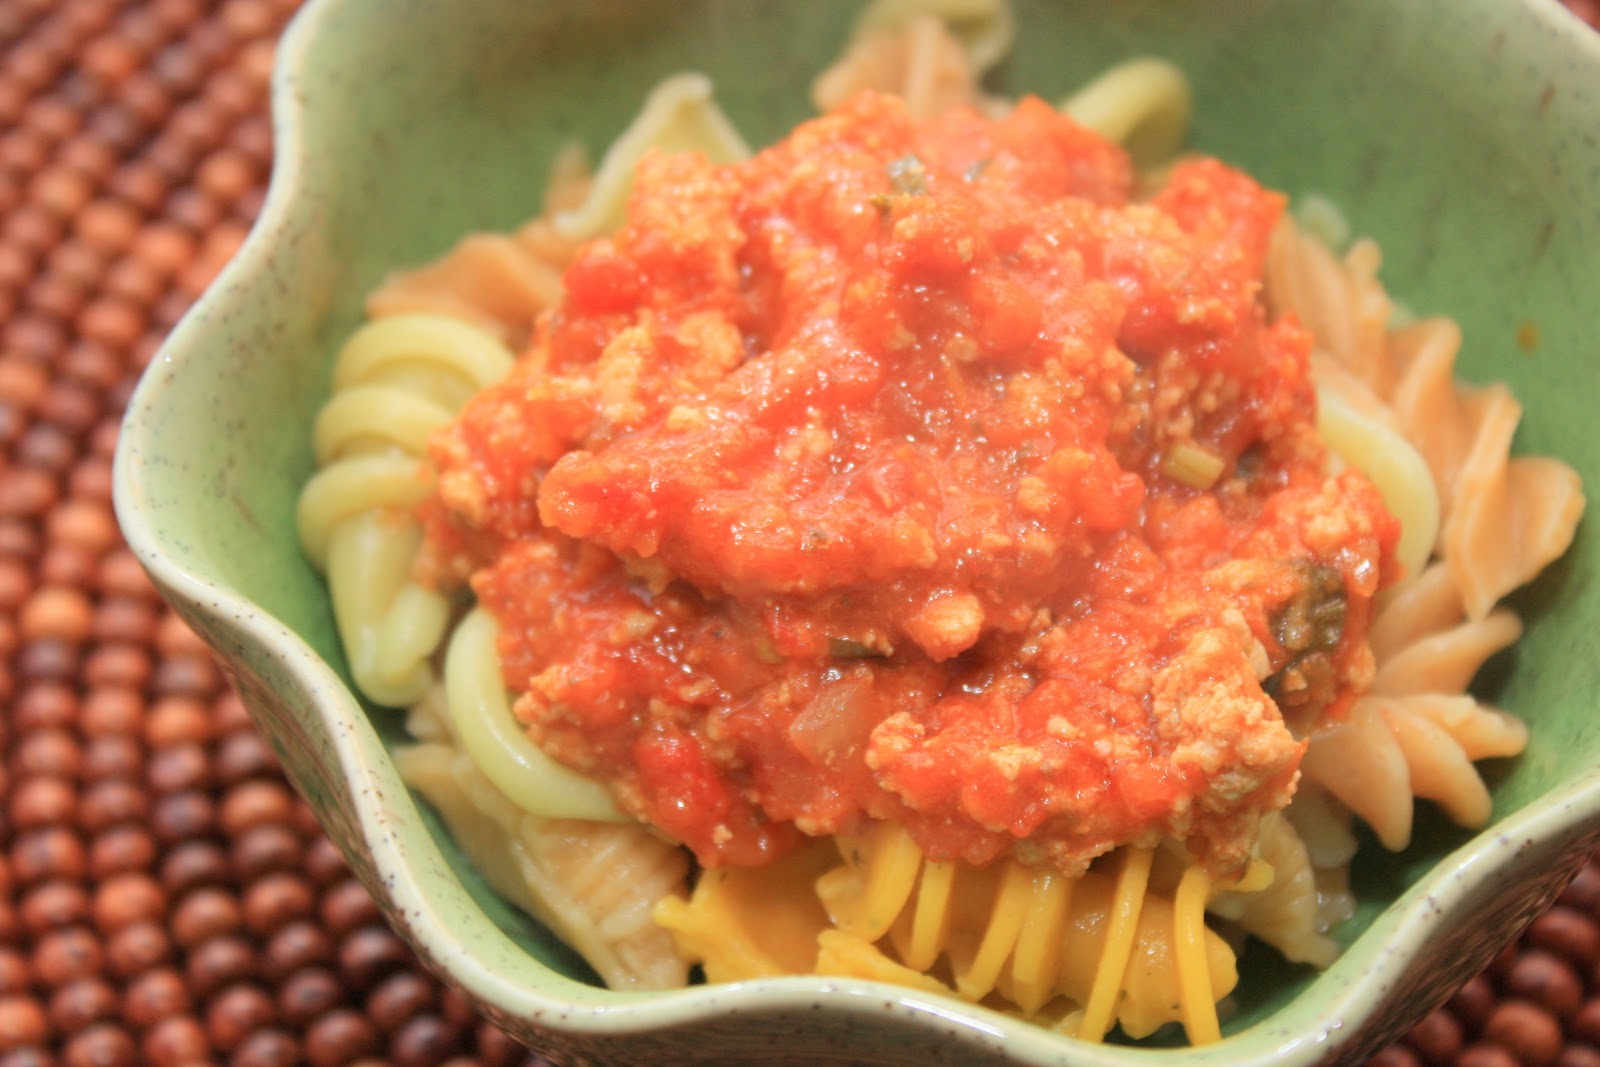
Wow.  I liked this sauce.  I liked this a lot.  I had some Rasta Pasta in my pantry so I poured the sauce over it and dug in.  (By the way, who knew a sweet potato, red pepper, carrot thyme, and lime flavored pasta blend would be so amazing? Apparently these Flour City Pasta guys did.)

Lou mentioned that this would be a staple in her house during the winter and I tend to agree.  This sauce is warm and comforting enough to get me through the nippy winter weather that has come barging into New Jersey way too early this year.  The meat and vegetables formed a hearty savory/sweet base for the sauce and the tomatoes and seasonings were aromatic and spicy.  As I have several pounds of pasta in my pantry, I will gladly consume all this bolognese sauce until it is extinct.

Thanks for the recipe, Lou!

Monday, November 7, 2011

Spekuloos Cookies


Who doesn't love some gingerbread? It's getting closer to the holidays now and even though Christmas decorations are popping up like wildfire, I'm trying to take it slow.  I want to ease into the holiday season.  

Just let me have this moment and a spekuloos cookie, please.

Yes, the spicy spekuloos cookie.  Tastes like gingerbread, ya know.  I like gingerbread.  This works.

And since I had spekuloos laying around (as we ALL should), I threw it in some batter and whipped up a few treats for no reason at all.  I see no problem with this.

Spekuloos Cookies
makes ~60 cookies*

Print Recipe
  • 1 cup unsalted butter
  • 1 cup spekuloos
  • 1 cup white sugar
  • 1 cup packed brown sugar
  • 2 eggs
  • 2 1/2 cups all-purpose flour
  • 1 teaspoon baking powder
  • 1/2 teaspoon salt
  • 1 1/2 teaspoons baking soda
  • 1/4 teaspoon allspice
  • 1/4 teaspoon nutmeg
  • 1/4 teaspoon ground cloves

1) Cream together the butter, spekuloos, and sugars.

2) Add the eggs, beating well after adding each egg.


3) In a separate bowl, sift together the flour, baking powder, baking soda, salt, and spices. 

4) Stir into batter, then put the batter in the refrigerator for 1 hour. 


5) Roll the dough into 1-inch balls and place on baking sheets. Flatten each ball with a fork, making a criss-cross pattern.


6) Bake in a preheated 375 degrees F oven for 8-10 minutes or until cookies begin to brown.  Let cool for several minutes before removing from the tray.

* The original recipe for this says that this batter yields 24 cookies.  I got much more than that, so I'm not sure what the deal was there.  Just be aware that you may get a lot more cookies than you bargain for.

My cookies sort of flattened out and didn't hold the criss-cross pattern very well.  I think the butter in the batter didn't chill as much as it should have, which lead the cookies to spread in the oven.  In spite of this, the cookies were pretty tasty.  Since they were thin, they were a little crunchy but I don't mind that at all.  Just because a cookie isn't chewy doesn't mean we throw it away.  Work with it, people.  The cookies ended up being a cross between a sugar and a gingerbread cookie.  This equals perfect yummy-ness.

Saturday, October 29, 2011

Ground Beef Kheema


For some reason, I have an obscene list of recipes bookmarked and just waiting to be created.  For some reason my brain thinks that I have all this spare time in which I can cook and bake to my heart's content.

Yeah right.

One of the recipes that I had save to try out sometime was something called a kheema.  More specifically, it was a turkey kheema recipe.  It was on my "To Make Soon" bookmark list, which means that I really really wanted to make it soon.  (I know I might be coming across as a deranged person right now, but really I'm not..  For serious.)  Of course I kept putting it off.  Then imagine my surprise one day when I was minding my own business, watching Aarti Party, and she began to talk about a kheema recipe.  I looked on in food jealousy as Aarti made a ground beef kheema on her show.

The next weekend, I was on top of this recipe...


Ground Beef Kheema
adapted from Aarti Party
makes 4-6 servings

Print Recipe
  • 3 tablespoons olive oil
  • 1 medium onion, finely diced
  • 4 cloves garlic, minced
  • 1 (1-inch thumb) fresh ginger, peeled and minced
  • 2 teaspoons ground coriander
  • 1 teaspoon paprika
  • 1/2 teaspoon garam masala
  • 1/2 teaspoon ground cumin
  • 1/2 teaspoon habanero sauce, optional
  • ~1 pound ground beef
  • 2 medium tomatoes, chopped 
  • 1/4 cup beer (I used Sam Adams Octoberfest)
  • Salt and pepper, to taste
  • 1/2 cup frozen peas, thawed
  • 2 teaspoons malt vinegar or apple cider vinegar
  • 1/4 cup chopped fresh cilantro

1) In a large skillet, heat the oil over medium-high heat. 

2) Add the onions to the skillet and cook until golden.

3) Next, add in the garlic and ginger.  Saute for another minute. 

4) Stir in the coriander, paprika, garam masala, cumin and habanero sauce and cook the mixture for 1 minute.

5) Place the beef in the pan, break up any lumps, and saute until the meat is no longer pink.


6) Toss in the tomatoes, beer, some salt and pepper.


7) Stir in the peas and simmer the kheema, partially covered, for about 5 minutes.


8) Sprinkle in the vinegar and the chopped cilantro.

9) Serve with rice, pasta, or on a bun (as a sloppy joe).


Let's be honest for a second.  I didn't read the reviews of Aarti's ground beef kheema at first.  When I made this, I added the cup of liquid (beer, in my case) that the original recipe called for.  Then I wondered why the sauce actually looked like soup for a hot minute.  Hmmm...that was when I read the reviews and noticed that everyone was complaining about the amount of liquid used in the recipe.  I updated the recipe above to only use 1/4 cup of beer instead. 

Now back to the kheema...

Why did I wait so long to make this thing?  I need to make this again and again.  I can't begin to tell you how warm, smoky, and spicy the kheema was. The beer gives the sauce an extra depth and the peas provide a nice snap with each bite.  I am torn as to whether or not I would try to add more spices next time; as in a healthier dose of the existing spices, not additional spices.  My urge to heavily season all my food wants me to do it, but this tasted great in any case, so if you're making this yourself, it's all up to you.

Monday, October 24, 2011

Red Velvet Cupcakes with White Chocolate Cream Cheese Frosting

I have been worn down.

My client has worn me down.  My manager has worn me down.

Yes.  They got me.  Over some red velvet cupcakes.


Let me tell you that ever since I started making cupcakes on a semi-regular basis, I have had to fend off requests for these particular cupcakes.  I routinely made the mistake of asking people for flavor suggestions and then I would hear the list of usual suspects.  Red velvet would always be on that list.  And I would always veto this suggestion because *gasp* I don't like red velvet cupcakes.

Somewhere in my distant past I had tried a red velvet cupcake and was turned off by it.  So although I hadn't tried one in years I knew I didn't like it.  And you can verify with any member of my family that I'm a stubborn one.  If you try to get my to like something repeatedly, I'll put my foot down and claim instant dislike.

I was able to fend off my client for the past year or two.  I finally caved in when my client and my manager teamed up to bombard me with red velvet cupcake requests.

FINE!
Red Velvet Cupcakes with White Chocolate Cream Cheese Frosting
cupcake slightly adapted from the Cupcakes blog recipe
yields ~36 cupcakes

Print Recipe
  • 3 3/4 cups cake flour
  • 1 1/2 heaping teaspoons baking powder
  • 3 tablespoons unsweetened cocoa powder
  • 1 1/2 teaspoons salt
  • 1/2 oz. red food coloring (half of a bottle) plus 1/2 - 1 teaspoon no-taste-red icing color gel (the original recipe states that you can use two bottles of red food coloring, but I was worried that it would give the cupcakes a funny taste)
  • 3/4 cup unsalted butter, softened
  • 2 1/4 cups sugar
  • 3 eggs, at room temperature
  • 1 1/2 teaspoons vanilla extract
  • 1 1/2 cups buttermilk, at room temperature
  • 1 1/2 teaspoons white vinegar
  • 1 1/2 teaspoons baking soda

1) Preheat oven to 350 degrees. Line muffin tins with cupcakes liners.

2) Sift together the cake flour, baking powder, cocoa and salt into a medium bowl and set aside.


3) Using a mixer, beat butter and sugar together for a few minutes, until light and fluffy.

4) Beat in the eggs, one at a time, then add in the vanilla.


5) Add the red dye to the buttermilk and mix well to combine.

6) Beginning and ending with the flour mixture, alternate adding the flour and buttermilk mixtures into the batter.  Beat well after each addition.


7) In a medium sized bowl, mix vinegar and baking soda. Be careful, as it will fizz.

8) Add the vinegar mixture to the batter and stir well to combine.

9) Fill cupcake cups with cake batter until they are ~2/3 full.  Bake for 16-18 minutes.

10)  Place muffin tins in your preheated oven. Bake for approximately 20 minutes, or until a toothpick inserted in the centers comes out clean.

11) Let the cupcakes cool for a few minutes in the cupcake tray.  Then remove them from the tray and allow to cool completely.

White Chocolate Cream Cheese Frosting
from my coworker Deirdre of Zoe's Cupcakes
  • 1/2 cup shortening
  • 1/2 cup butter, room temperature
  • 12 ounces cream cheese, room temperature
  • 1 tablespoon vanilla extract
  • 6 ounces white chocolate, melted
  • 3 1/2 cups confectioner's sugar

1) In a mixer, cream together the shortening, butter and cream cheese.

2) Add the vanilla and melted chocolate.  Stir to combine.

3) Slowly add the sugar to the mixture, a few tablespoons at a time.
 
4) Spread or pipe onto cooled cupcakes.  (If you choose to pipe the frosting, you may need to double the recipe.)

I snagged this frosting recipe from one of my coworkers.  She had used it to frost a red velvet cake and it was so delicious I knew I needed to "borrow" it for my red velvet cupcakes.  The frosting that I made came out pretty much the same as hers, thank goodness.  It was light and fluffy with an extra oomph of sweetness and flavor from the white chocolate.  Most people couldn't figure out the identity of this secret ingredient but the chocolate really made the frosting outstanding.  And combined with the red velvet cake, I have to say that I may now be a red velvet cake/cupcake believer.  The cake had the cocoa flavor that is distinctive to any red velvet cake.  I also found that the texture of the cake was pretty light and airy, which matched well with the frosting.

OK, so maybe the red velvet cupcake is beginning to warm my stone cold heart.  Who knew?  I didn't take these cupcakes to my client or my manager because I ended up over-baking them by a few minutes.  I think our oven is having technical difficulties.... But I will make sure that my work family will get their red velvet cupcake fix very soon!

Monday, October 17, 2011

Fresh Corn and Goat Cheese Polenta


For as much as I've been pretending it's still summer, I really do love fall.  And I will have more fall-related recipes on this blog soon.  But I think I've finally satiated my summer corn fixation with one final final final corn recipe.  I've been saving this one for a few weeks.  It's not because I'm selfish, but because I simply haven't had the time to get around to it.  So now here it is.  Hopefully this recipe isn't too late to catch the last ears of fresh corn at the market or store.

When I made that Chili-Corn Casserole the other day, I found that I still had a lot of polenta left over.  I decided I would use the rest of it in a variation of a Joy the Baker recipe.  And I would definitely recommend this fresh corn and goat cheese polenta action for a quick breakfast or brunch situation.  


Fresh Corn and Goat Cheese Polenta
adapted from Joy the Baker's Fresh Corn and Goat Cheese Grits recipe
yields 4-5 cups

Print Recipe
  • 1 ear of corn, kernels cut off
  • 1/2 small onion, diced
  • 1 clove garlic, chopped
  • 18 oz tube precooked polenta, chopped as finely as possible
  • 2 tablespoons butter
  • 1 cup 2% milk (or whichever kind of milk you prefer)
  • 1 teaspoon olive oil
  • 2 oz goat cheese, crumbled
  • Salt
  • Pepper
  • Paprika and/or cayenne pepper (optional)


1) Drizzle the olive oil in a saucepan and saute the onion for 1-2 minutes.


2) Add the corn and garlic to the pan.  Saute for another 1-2 minutes, or until softened.


3) Season with salt and pepper to taste.

4) Meanwhile, combine the polenta, butter and milk in a microwave-safe bowl.  Microwave the mixture for a minute at a time, mashing the polenta and milk together periodically to make it creamy.  (You can also do this step in a pot over medium heat on the stove, but it's quicker in a microwave.)


5) Stir the corn and onion mixture into the polenta mixture.


6) Add the crumbled goat cheese.  Season with salt and pepper to taste

7) Sprinkle a dash of paprika and/or cayenne pepper to taste.

I think this dish could have been amped up by using creamy polenta that was made from scratch instead of the pre-made polenta.  But if you're in a pinch, or if you just have leftover pre-made polenta, then you can make this instead.  The creamy, tart goat cheese melts into the butter polenta and provides the perfect complement to the sweet corn.  This dish would be a great addition to any meal.

Tuesday, October 11, 2011

Goat Cheese Frozen Yogurt

My taste buds are funky.  They make me crave things at the oddest time.

Like that time when I wanted to eat some goat cheese but the only cracker-like objects I had in the kitchen were pretzels.  Then I started craving goat cheese and pretzels.  Because it's actually a pretty good combo.


More recently I've been craving frozen yogurt.  Our neighborhood grocery store just opened up a frozen yogurt/coffee bar and it's absolutely amazing.  I walk to the grocery store at all hours.  I drive to the grocery store at all hours.  I went there at 7am one morning to get some frozen yoguyt on my drive in to work that day.  It turns out you cannot get frozen yogurt there at 7am, even though the they claim to be open then.  That was a sad day.

So imagine my excitement when one of my favorite bloggers, Julia, busted out with a goat cheese frozen yogurt recipe.  I knew I had to try this as soon as possible.  Yes, of course I waited until it was fall to test this recipe out.  You wouldn't think I'd do it during the summer, did you?

Goat Cheese Frozen Yogurt
slightly altered from the Fat Girl in a Skinny Body blog
makes 3-4 cups

  • 14 ounces 2% Greek yogurt
  • 1/2 cup sugar
  • 3 ounces goat cheese, softened
  • 1 tablespoon cornstarch

1) Combine all ingredients in the blender and mix until fully incorporated.

2) Pour the mixture into a sealed, freezer-safe container.  Refrigerate for 1 hour.

3) Place the container in the freezer for about 7 hours.  The amount of time you will need to freeze the yogurt depends on how cold your freezer gets.  Also, it depends on how soft or hard you like your yogurt.  You can experiment with the firmness of the frozen yogurt and see what you like best.

* One of the things Julia recommended was stirring the frozen yogurt about halfway through the freezing process.  I did this as well, but like Julia said, she wasn't sure if this actually made a difference or not.  The frozen yogurt still came out fine!


What can I say?  I loved this.  The frozen yogurt was tangy from the goat cheese, and sweet and creamy from the yogurt.  To break it down, this mostly tastes like frozen Greek yogurt with sweetened goat cheese.  I know that should be pretty apparent from the ingredient list, but I was still surprised for some reason.  Surprised in a good way though.  In a good, stuff-your-mouth-full-of-goat-cheese-frozen-yogurt way.