Wednesday, May 25, 2011

Saucy Pulled Pork

There is nothing like the idea of perfectly seasoned strands of pork dredged in barbecue sauce to get me excited. Like REALLY excited! Maybe giddy is a better description. I just know that life in general is pretty awesome when I'm about to take a bite of a pulled pork sandwich. Or when I stand over the slow cooker and shovel forkfuls into my mouth.

When my friend Lindsey sent me a link to some cupcakes at the AmyBites blog, I naturally perused the website for other recipes. Why wouldn't I, right? Then the heavens opened and people started singing when I alighted upon a recipe for pulled pork. I've made pulled pork before, but the results were OK. The pork was pretty good, but I later realized that I hadn't allowed the meat to get to the "falling apart" stage before attempting to shred it. So although it was fully cooked, I had to exert excessive energy into shredding. At any rate, I was also interested in trying out another pulled pork recipe. You really can't have too many, you know.

Saucy Pulled Pork
recipe slightly adapted from the amybites blog

Print Recipe
  • 2lbs pork butt
  • 1 teaspoon salt
  • 1 teaspoon ground mustard
  • 1/4 teaspoon cayenne pepper
  • olive oil
  • 1 medium onion, chopped
  • 30 oz barbecue sauce (I used ~3/4 of a 40oz bottle of Sweet Baby Ray's, my favorite)
1) Combine the salt, ground mustard, and cayenne pepper. Rub the mixture all over the pork.

2) Add a drizzle of olive oil to a pan, over medium to high heat.

3) Brown the pork butt on all sides. Do not attempt to cook the pork all the way through.

4) Place the pork in a crock pot, along with the onions and barbecue sauce.

5) Turn the crock pot on high and cook for 6-8 hours. The pork is done if the meat falls apart when shredded with a fork.

6) Remove the pork from the crock pot and shred in a bowl. Place the shredded meat back in the crock pot and mix with the sauce. Serve as you wish.

This pulled pork would be a part of my last meal. I swear it. The pork is tender and melts in your mouth. Every few bites, you also get a taste of the crust which was seared into the pork. The sweet and spicy barbecue sauce was the perfect accompaniment to the meat. I think it tastes best on a roll with some cheese, but if you don't have a roll handy, try it tossed with some pasta!

Wednesday, May 18, 2011

Warm Pear Tart with Cheese & Honey

I've had Tyler Florence's "Eat This Book" cookbook decorating my desk for the past several months. I'm embarrassed to admit that it may have even been closer to a year. It was a glorified bookend. Actually, my desk is littered with various packages of gum and candy, so I can't even give this cookbook the distinction of having been a bookend.

I've been mistreating this poor cookbook for way too long. I finally laid down the law with myself and made it a requirement to make a recipe out of it. I settled on the Warm Pear Tart with Blue Cheese and Honey. What can I say? I'm a sucker for that salty/sweet combination.

After checking out the refrigerator, I quickly realized that I already had 3 different types of cheeses in there. This made me reluctant to purchase the blue cheese for this tart. And unfortunately, none of the cheeses I already had would be a good substitute. I wanted something that I would definitely use up in a reasonable amount of time. Once in the grocery store, I decided to purchase a soft ripened cheese, very similar to a Brie or Camembert. I could always wolf that down with some bread, crackers, or by itself.

Now. I love Tyler Florence. He was one of the first Food Network chefs I remember from when the network first started out. But I have to question the proportions in his original recipe. I ended up adjusting the proportions of this tart to suit one roll of puffed pastry. (The puffed pastry usually comes in a box with two rolls of pastry. I used just one of them in this recipe.) I only needed one pear and a few ounces of almonds and cheese. This is a much smaller quantity of ingredients than the original recipe calls for. I guess the Food Network chefs go big! But for my tastes, I think I can handle a scaled-down version.

Warm Pear Tart with Cheese & Honey
adapted from Tyler Florence's Eat This Book Cookbook
yields ~ 6 servings

Print Recipe
  • 1 sheet frozen puffed pastry
  • 1/2 cup blanched almonds
  • 2 tablespoons sugar
  • 1 tablespoon water
  • 1 Bosc pear, sliced lengthwise (I prefer to remove the seeds, but you don't have to if you don't want to)
  • Honey
  • 5 ounces soft ripened cheese, sliced
  • 1 egg white, beater with a drizzle of water for glazing
1) Preheat the oven to 400 degrees.

2) Spray a sheet pan with cooking spray. Place the puffed pastry on the pan.

3) Using the tip of a knife, score the edges of the pastry, about an inch from the edges.

4) Use a fork to poke holes in the pastry inside the scored border.

5) Combine the almonds, sugar, and water in a food processor. Grind to a paste. If the mixture is too crumbly, add a few more drops of water.

6) Spread the almond paste over the inside of the scored pastry.

7) Place the cheese over the almond paste.

8) Arrange the sliced pears over the cheese.

9) Drizzle with honey, to taste.

10) Brush the border of the pastry with the egg white glaze.

11) Bake for ~15 minutes, until the pastry is golden and brown. Allow to cool for at least 10 minutes before slicing and eating.

This recipe was a winner. I might have had several slices in one night. OK, of course I did. Would you expect anything less? The pastry was crisp and buttery, the cheese and almonds provided the "salty" and the sugar, honey and pears provided the "sweet". The pears were still pretty crispy after their excursion in the oven, which was a pleasant surprise. It made me feel like I was eating something healthy! Just maybe.

Sunday, May 15, 2011

Champagne Cupcakes

I was having a few drinks with my coworkers the other day and of course this led me to talk about boozy cupcakes. Because who doesn't love a boozy cupcake, and why wouldn't I want to talk about it? Since I haven't seen my coworkers in so long, they didn't know that I have a food blog or that I have a slight obsessions with making alcohol-laced cupcakes. This then led to the inevitable question of "When are we getting cupcakes?". I tried to think of which cupcake recipe I wanted to tackle next. I had a few recipes that I was planning on making soon, but within a matter of hours, two things happened:

1. My roommate sent me a recipe for Champagne Cupcakes, and
2. Stef from Cupcake Project posted these Bellini Cupcakes.

The signs were overwhelming! I knew I had to whip up a batch of champagne cupcakes.

Champagne Cupcakes
slightly adapted recipe from Cupcake Project for Paula Deen
makes ~24 cupcakes

Print Recipe
  • 6 large egg whites, room temperature
  • 2 cups champagne, room temperature
  • 3 cups minus 6 tablespoons* all-purpose flour
  • 1 1/2 cup sugar
  • 4 teaspoons baking powder
  • 1/2 teaspoon salt
  • 1 cup unsalted butter, room temperature
1) Preheat the oven to 350 degrees F.

2) In a bowl, combine the egg whites and champagne. Set it aside.

3) In another larger bowl, mix together the flour, sugar, baking powder and salt. You can also do this by hand if you're ambitious.

4) Add the butter to the dry ingredients and mix until the batter resembles moist crumbs.


5) Pour the egg whites/champagne mixture into the dry ingredients and mix until fully combined.

6) Pour batter into cupcake liners** until about 3/4 full.

7) Bake for 25-28 minutes or until cupcakes spring back when touched lightly.


* I converted measurements for cake flour to all-purpose flour. The ratio isn't 1:1. The end result requires the use of 3 cups of all-purpose flour minus 6 tablespoons. I couldn't figure out how to convert this new measurement into cups, so there you go.

** I used 12 paper liners and 12 foil liners when making these cupcakes, since I couldn't decide which liner I liked better. This worked out really well in the end because I unfortunately realized that the cupcake was sticking to the paper liners. I'm not sure why this happened, but I would definitely recommend using foil liners. The cupcakes come out of those liners very easily.

And of course...champagne frosting...

Champagne Buttercream Frosting
from Gimme Some Oven
  • 4 3/4 cups powdered sugar
  • 1 1/2 cup butter, room temperature
  • 3/4 teaspoon vanilla extract
  • 5 1/2 tablespoons champagne, room temperature
1) Whip the butter for several minutes, using a mixer. The butter should be almost white.

2) Add the sugar until incorporated with the butter.

3) Add the vanilla and champagne. Beat together for a few minutes until the desired consistency is achieved. If the frosting is too stiff, add more champagne. If the frosting is too thin, add more sugar.

These cupcakes were pretty easy to make. I didn't have to fight with the batter, since it was pretty runny, but at the same time the cupcakes turned out to be light and fluffy. So did the frosting. Personally, I couldn't really taste the champagne. I just thought it tasted like a really good vanilla cupcake. However, my roommate Kimmy was able to discern the champagne flavor in the cupcake. I guess her taste buds are a little more sensitive than mine. My coworkers were also divided with the final product. They liked the flavor but some said they could taste the champagne while others couldn't. I'm not concerned. I still think they are pretty good cupcakes and it's likely that I'll make these again since they're so simple. I'll probably make some sort of variation though, such as strawberries with champagne cupcakes, mimosa cupcakes, or bellini cupcakes (a la Cupcake Project).

Note: I kept this cupcake classy with some cheap Andre champagne. Because I could.

Wednesday, May 11, 2011

Hell's Kitchen Flea Market: Gourmet Food Truck Bazaar Review

View from the entrance to the flea market

This past Sunday, my friend Katie and I partook in an amazing new-to-us event: the Hell's Kitchen Flea Market Gourmet Food Truck Bazaar.

Has someone looked into shortening this name? Seriously. I have trouble remembering it every time.

Inflatable devil / official greeter at the entrance

I have a soft spot for a good food truck. Show me some food on wheels and I'm there. Maybe it's the convenience of ordering "fast food", or maybe it's the fact the food HAS to be good because no one's showing up for the atmosphere.

Usually I stalk food trucks on Twitter to see where they're located, then try to justify a convenient detour which would place them directly in my walking or running path. But when Katie suggested heading to a food truck festival, I jumped at the chance to encounter several trucks at once.

The following food trucks were on the roster for Sunday, May 8th: Luke's Lobster, Kelvin Natural Slush Co., Gorilla Cheese NYC, Rickshaw Dumpling Truck, Vegan Cinnamon Snail Organic Vegan Food Truck, Kimchi Taco, and Coolhaus NY Gourmet Ice Cream Sandwiches.

Once we got to the festival, our first stop was at Luke's Lobster truck. I love seafood, especially lobster and crab. I grew up with them and they've been good friends to me over the years. Pair these shellfish with a buttered, grilled bun, and special seasonings on top and they become out of this world. Initially, I tried to appear civilized and ordered half a lobster roll and half a crab roll. I immediately wolfed them down and was amazed at the fresh deliciousness of the meat. Each bite was a taste of heaven. We tried to wheedle the seasoning ingredients out of Ben, our new friend at the truck, but he wasn't giving up the goods and we were left to sniff it out on our own. Probably some oregano, thyme, and other herbs and spices. I may have to go back for a lot of more "research" until I get this spice blend down pat.

Half crab roll (top) and half lobster roll (bottom). They give you more lobster
on the roll than shown in this picture. I lost myself in the lobster and forgot
I was supposed to document this experience.

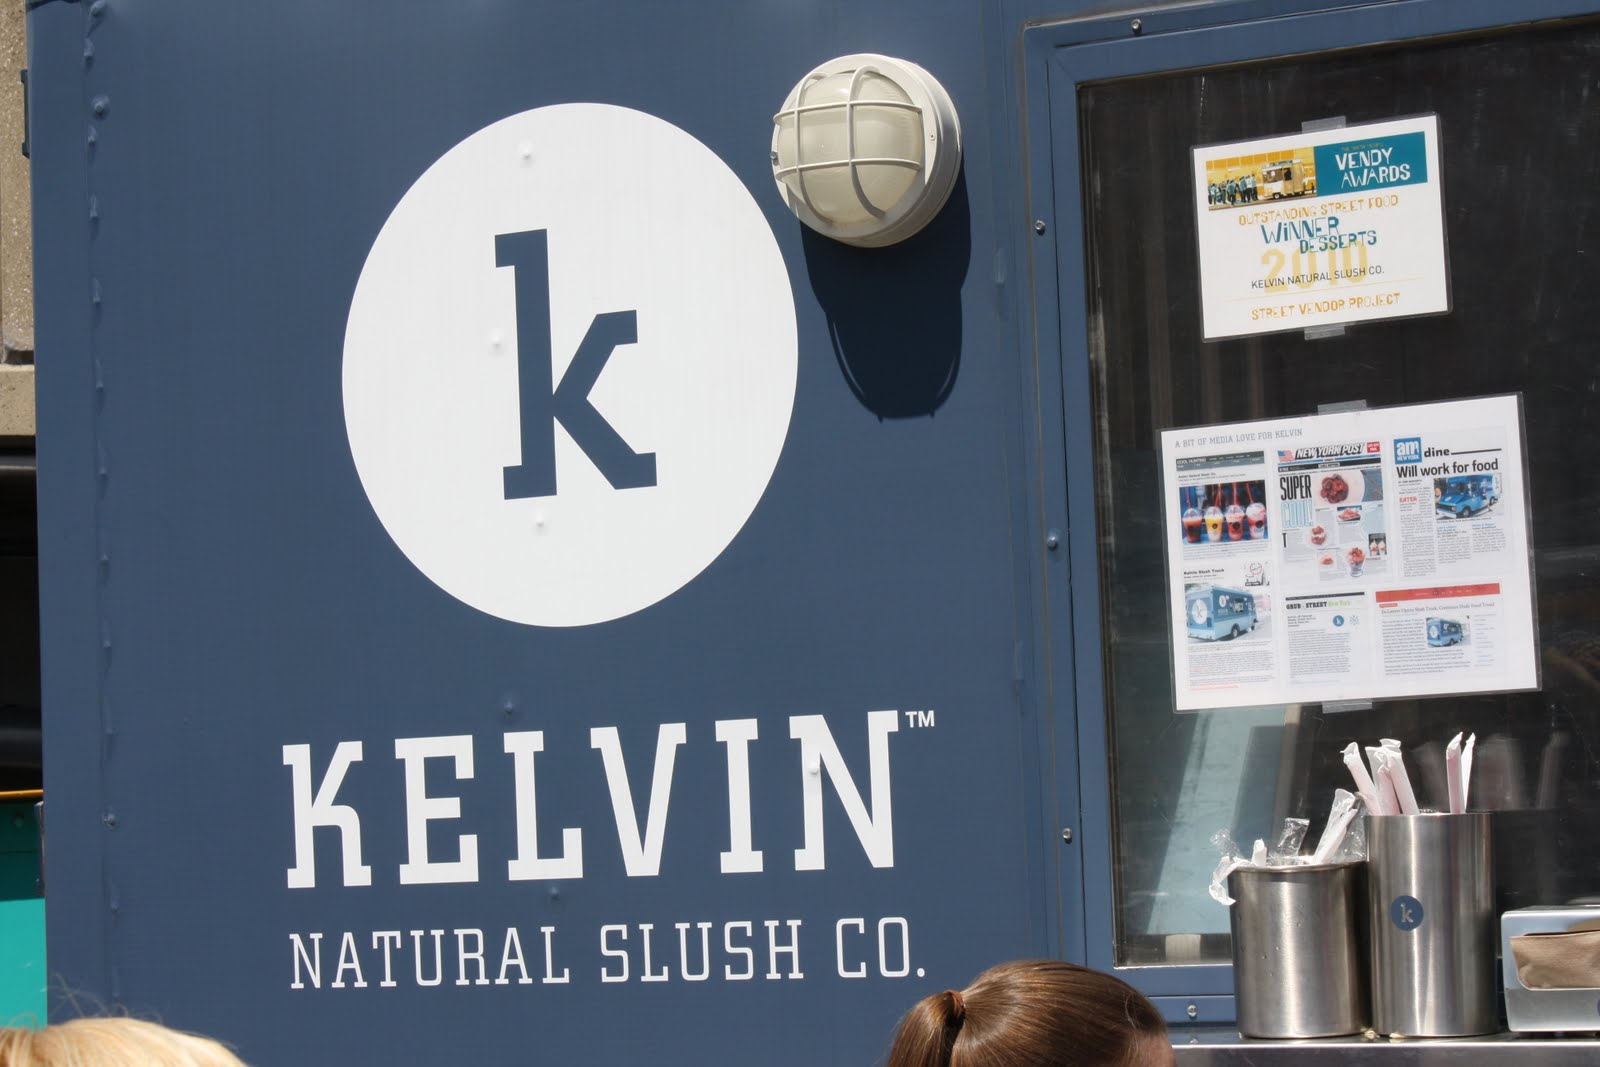
After our lobster and crab roll adventure, we realized that it was actually hot outside! Spring was here and the sun was beating down on us. In a search for a reprieve from the heat and also to quench our thirst, we ended up at the Kelvin Natural Slush Co. truck. They have an interesting ordering system there. There are three base flavors (Ginger, Citrus, and Tea) to choose from. Then you can choose to add a "mix-in", which could be pink guava, mixed berries, basil, mango, mint, raspberry, white peach, or a few other flavors. Katie had the citrus base flavor with a pink guava mix-in. I chose the citrus base flavor with a white peach mix-in. Let me tell you that they are not kidding when they say citrus. Wow. That thing was tangy. But after the ice melted a bit and the mix-in became more incorporated in the drink, it mellowed out and came together nicely. I bet it would be amazing if a shot or two of alcohol were added...

Unfortunately, we didn't make it to the other trucks to taste their food. Their menus looked amazing, but we just couldn't handle it. The Gorilla Cheese truck smelled delicious and as you all should know, I love my cheese. Especially melted cheese. But it was too hot that day to have a grilled cheese sandwich. I've heard nothing but amazing reviews of the Rickshaw Dumpling truck, but their line was the equivalent of at least a 20 minute wait, so that truck was out of picture fairly quickly. Ditto for the Kimchi Taco truck. I love me some Cinnamon Snail, but I had caught up with that truck the previous weekend in Hoboken and wanted to try out the other places while I had the opportunity. (I had the Basil Pesto Grilled Tofu sandwich, Raspberry Ganache donut, and Strawberry Cheesecake donut last weekend at the Cinnamon Snail. Vegan never tasted so good. And yes, I had it all at once. I had run a 5K that morning, so I deserved it.) It turned out that the Coolhaus truck had some issues and they weren't able to show up after all. That was sad. Ice cream sandwiches remind me of hanging out with friends on warm high school nights.

But the primary reason we didn't get to eat at all the trucks? We were so full! These people are not messing around when they hit you with this food. Can I get a sample size please? I need to make this suggestion.

Menu at the Gorilla Cheese truck

And to top it all off, there were desserts! We spied two dessert vendors set up at tables next to the food trucks: Lloyd's Carrot Cake and The Cavity Shoppe. They were selling sweets that looked completely delicious. Although I'm a big fan of carrot cake, The Cavity Shoppe won my heart over with cupcakes. Not just ordinary cupcakes, but cupcakes in a jar. They had a beautiful presentation and this place specializes in interesting (and boozy!) flavors, so obviously I had to have one. They only had a few cupcakes left, so I chose a Maple French Toast flavor. Delicious! It appears to be a combination of cinnamon and maple flavors wrapped up in a 3-tiered cupcake, served in a small mason jar and eaten with a spoon. So good. Only problem was I had to eat it in several installments because I was still full. Obviously even that could not stop me from eating the entire cupcake. Obviously.

To feel as though we were getting some sort of exercise, we finally walked around and checked out the eclectic vendors on the outskirts of the flea market. The flea market is always an interesting place, filled with random but fascinating people and wares. Eventually we decided to call it a day, otherwise known as "we headed to a bar". On our way out though, we had to hit Luke's Lobster again for a half lobster roll each. And it was just as incredible the second time as it was the first time. Unfortunately, (or fortunately?) they had run out of napkins by this time. After chomping into our lobster rolls for the second time that day, we were left only with the scent of butter and special seasonings (come on Ben, can't you just spill the beans?!) on our hands. I shouldn't admit this, but I sniffed my fingers constantly for the next hour. I have no shame.

Our inaugural food truck bazaar trip was an amazing experience! This event takes place at the Hell's Kitchen Flea Market (entrance on 39th St and 10th ave in NYC) on the second Sunday of each month. I've already spread the word that I'll be back in June. I'm looking forward to finally eating at Coolhaus as well as digging into different menu options at the other trucks. So who's with us?

Tuesday, May 10, 2011

Bahamian Johnnycake

I recently went home to the Bahamas and each time I've been with my family lately, I've been trying to snag another recipe to post on the blog. There are two reasons for this. The first is that I think it's pretty cool to make food from different parts of the world and learn more about other countries. The second reason is purely selfish. Since most Bahamians tend to cook without recipes, I'm pretty sure I won't be able to recreate my favorite dishes years down the road. So I guess I'm also trying to record as many recipes as possible for posterity.

The latest installment in this series is a something called a johnnycake. I looked up the word "johnnycake" online and Google came back with some cornmeal- or cornbread-type thingy. Let me assure you that this is not what we make in the Bahamas. Apparently the term johnnycake has different meanings in different countries. (Although this does make me want to try the American version of johnnycake. I gladly accept gifts of food, just so you know.)

The Bahamian version of johnnycake is a cross between a dense bread and a slightly sweet cake. It's best served warm, slathered with butter and accompanying a soup or stew. However, if you're anything like me and my family, you can have it anytime of the day.

Bahamian Johnnycake

Print Recipe
  • 1/2 cup butter, room temperature + extra for greasing pan
  • 3/4 cups sugar
  • 4 cups flour
  • 1/2 cup water
  • 1/2 teaspoon salt
  • 2 teaspoons baking powder
  • ~3/4 cup milk
1) Preheat oven to 325 degrees.

2) Using an electric mixer, beat the butter and sugar together until combined.

3) Add the flour, water, salt, and baking powder to the bowl.

4) Add the milk slowly until the batter is sticky.

5) Dust hands with flour. Transfer dough from bowl to greased 9x9 pan. Gently flatten the dough in the pan.


6) Bake for ~1hr or until the edges of the johnnycake are browned. The johnnycake will not rise much.

7) Let cool for several minutes before cutting into the johnnycake.

This is an easy, simple recipe which will provide you with a warm and delicious addition to your breakfast, lunch or dinner.

Sunday, May 8, 2011

Saag Paneer

I’ve been partaking in some “gin moments” lately. This ultimately leads to a little bit of a “headache” the following day. In the case of such events, the roommate and I usually recline on the couch and order for Indian food the next day. Paneer Makhani and Saag Paneer are my go-to items.
Although ordering from an Indian restaurant is easiest, I eventually decided to try my hand at making my own Indian dish. I’ve already made Paneer Makhani, so I decided to experiment with Saag Paneer.
Saag Paneer
adapted from Quick Indian Cooking
  • 14-oz paneer, cubed
  • 2 10-oz packages frozen, chopped spinach
  • 1 teaspoon habanero sauce (can adjust to taste or use another type of hot sauce)
  • 2 tablespoons ghee or vegetable oil
  • 1 medium onion, diced finely
  • 4 cloves garlic & 1 inch ginger, pureed to a paste
  • 2 teaspoons coriander powder
  • 2 1/4 teaspoons cumin powder
  • 1 1/4 teaspoons chili powder
  • 1/2 teaspoon turmeric powder
  • 1/2 teaspoon fenugreek leaves, crushed lightly
  • 3/4 teaspoon garam masala
  • 1/4 cup heavy cream
  • salt to taste
1) Place the paneer in a bowl of boiling water for 10-15 minutes. Drain the cubes and set aside for later use.
2) Microwave the frozen spinach for five minutes, or until thoroughly defrosted.
3) Add the habanero sauce to the spinach, then puree the mixture by placing it in a blender or by using an immersion blender.
4) Add the ghee (or other type of oil) to a frying pan over medium flame.
5) Fry the paneer. Once the cheese is golden brown, remove from the oil and drain on paper towels.
6) Add the onion and garlic/ginger paste to the oil and fry until the mixture is slightly browned.
7) Add all the spices except the garam masala. Stir to incorporate. Let the mixture fry for about 10 minutes, stirring occasionally.
8) Add the spinach to the onions and stir to combine. Add salt to taste.
9) Lower the flame so that the spinach and onions are simmering. Let the mixture simmer for about 5 minutes.
10) Stir in the garam masala and the paneer cubes. Let all the ingredients simmer for another five minutes.
The end result was different from the food I usually get from the Indian restaurant in Hoboken. Let’s face it, I knew this wouldn’t taste exactly like the entrĂ©e I order since I’m pretty sure the restaurant uses more cream and a more intricate spice blend than I do. But. I still got the same flavor of the Saag Paneer. The spinach was smoky and spicy and the paneer was firm on the outside but soft and a little chewy on the inside. I spooned some of this over a plate of rice and my hangover was on its way to being cured.

Tuesday, May 3, 2011

Broccoli Gratin

I've been on a personal quest.

I have a subscription to the Food Network Magazine, yet how often do I make recipes from the magazine? I'd prefer not to answer that. But if you've been reading this blog for a while, you'll know that I've recently been trying to rectify this situation.

So when I wanted to make a quick side dish one day, I shirked my trusty computer's Bookmarks folders and instead picked up my Food Network binder. This happens to be exactly what it sounds like: a binder where I've gathered Food Network Magazine recipes that I want to make. I ran across a Brussels Sprouts Gratin recipe that called for a few non-standard items I already had on hand: heavy cream and breadcrumbs. And who doesn't love using up items that are already in the kitchen?

Unfortunately, I have come to realize that in spite of my repeated attempts to like brussels sprouts, this just may not happen. In light of this, I quickly swapped in broccoli for the sprouts and all was right again in my world.

Broccoli Gratin
adapted from Food Network Magazine's Brussels Sprouts Gratin recipe

Print Recipe
  • ~1 1/2 lbs broccoli
  • Pinch of red pepper flakes
  • 1/2 cup heavy cream
  • Salt & pepper, to taste
  • 1/2 cup grated white cheddar cheese
  • 1/4 cup breadcrumbs (I used Italian style but any kind should do)
  • 1 tablespoon butter, cut into pieces
  • Butter or Pam (or similar cooking spray) for the dish
1) Preheat oven to 400 degrees F.

2) Spray the bottom of a 1-1/2 qt baking dish with cooking spray or coat with butter, as desired.

3) Place the broccoli in salted, boiling water for 3-4 minutes, or until tender.

4) Drain the broccoli and chop into bite-sized pieces. Add the broccoli to the baking dish.

5) Add the red pepper flakes, and salt & pepper to taste. Toss to coat, then spread the broccoli out evenly in the dish.

6) Pour the cream on top of the broccoli, then sprinkle with the cheese and breadcrumbs.

7) Add the pieces of butter on top of the broccoli.

8) Bake the dish until the dish is bubbly and the cheese is melted through, ~15 minutes.


In my version, I opted to take a shortcut and use canned breadcrumbs. Don't. My breadcrumbs provided great flavor, but the texture was more like dust. These breadcrumbs would be fine in a meatloaf, but take the time to make homemade breadcrumbs for this dish.

Beside that little hiccup, I have to say I really enjoyed this. I love broccoli, so I was already one step ahead of the game. After adding some butter, heavy cream and cheese to the mix, this dish just became a new "go-to" item for me.