Monday, August 29, 2011

Potato-Portobello Gratin


I've been neglecting sides lately.

Entrees? Covered.

Desserts? I got you.  

But sides haven't been getting much love.  Enter the Potato-Portobello Gratin.  

The first gratin I made was a Broccoli Gratin, which was quite tasty.  Since then I've been interested in making another gratin, but I never quite got around to it.  I stumbled across this quick side dish a while ago so I finally made time to whip it up.

Potato-Portobello Gratin
slightly adapted from Alton Brown's recipe

  • 4 Yukon gold potatoes, peeled
  • 2 Portobello mushroom caps, sliced thinly
  • 1-2 teaspoons fresh dill, chopped
  • 1 1/2 cups grated Parmesan
  • 3/4 cup heavy cream
  • salt and black pepper, to taste


    1) Preheat oven to 400 degrees F.  Lightly spray a 9x13 inch baking dish with cooking spray.  Reserve 1/2 cup of the cheese for the top of the gratin.

    2) Thinly slice the potatoes into rounds.  (If you're fancy, you can use a mandolin for this.  I didn't have one so I worked on my knife skills.)

    Tip: I kept the potatoes in a bowl of water as I went along to prevent browning.

    3) For the first layer, lay the slices in overlapping rows on the bottom of the pan.  Lightly season the first layer with salt and pepper.

    4) Place the mushroom cap slices on top of the potatoes.

    5) Scatter a thin layer of dill over the mushrooms.

    6) Spread a handful of the cheese over the dill.

    7) Repeat Steps 3-6 until the gratin is completed.  Don't press down on the gratin while you are building it.  Otherwise, the cream won't be able to get between the layers.

    8) Pour the cream over the gratin.  You may not need to use the entire 3/4 cup of cream.  Pour until you see the cream at the top of the gratin or until you run out of cream.

    9) Sprinkle the 1/2 cup of reserved cheese over the top of the gratin.

    10) Cover the baking dish loosely with foil and bake for 40 minutes.  The gratin is done when you can easily pierce the potatoes with a sharp knife.

    11) If the gratin is done, remove the foil and bake for another 5 minutes.  You can also use a broiler for this step.*

    12) Remove the baking dish and allow the gratin to sit at room temperature for 15 minutes before cutting into it and serving.


    * I have a confession: The broiler tray of the oven is storing baking trays and I was too lazy to move them in order to use the broiler.  So there. Now you know.

    Overall, I like this side dish.  I didn't love it, however.  You guys already know me, right? So you wouldn't be surprised if I told you that I wanted more cheese in this.  There was also something else missing, but I can't quite put my finger on what it might be.  Here's what I did like: the potatoes were tender, the portobellos were still a little firm and the dill provided a nice fresh flavor.

    So there ya go.  This dish doesn't quite stack up to my Broccoli Gratin, but I am not discouraged. It's time to try, try again.


    Friday, August 26, 2011

    Creamy Corn Chowder


    It's summer.  Yes.  It's still summer.  Never mind the (very) minor chill in the air in the mornings and evenings now.  I'm holding on to the dream of warm weather sticking around for the coming few months.  It's still summer.  I swear.
    To help fuel my endless summer fantasy, I made a creamy corn chowder, courtesy of Rocco's Now Eat This Cookbook.  I wanted to take advantage of the fresh corn that is still in season right now and sweet, fresh corn always reminds me of summer. For some reason I was also craving a chowder of sorts, so Rocco's recipe really addressed both of my cravings.  Think of this as a gently compromise between summer and fall.


    Creamy Corn Chowder
    slightly adapted from Rocco's Now Eat This cookbook
    makes ~8 servings

    Print Recipe
    • 2 small onions, diced
    • Drizzle of olive oil
    • Corn kernels from 6 ears fresh corn
    • 3 cups cauliflower, diced
    • 5 cups 2% milk (or any % desired)
    • Habanero sauce, to taste
    • 4.25 oz can green chiles, diced finely
    • 14 oz Greek yogurt
    • 1 bunch scallions, sliced thinly
    • Salt and pepper, to taste

    Tip: If you do harvest the corn kernels from ears of fresh corn, run the back of your knife down the empty ear of corn once you're done removing the kernels.  "Corn milk" will be produced and you can add this to the soup for extra flavor.

    1) Add the olive oil to a large pot over medium heat.  When the oil is fragrant, add the onion and corn.


    2) Saute the onion and corn until they start to soften.  Season with salt and pepper.

    3) Add the habanero sauce, cauliflower and milk. (Add the "corn milk" at this time as well.)  Cover the pot and bring the chowder to a boil.


    4) Reduce the heat to medium-low and allow the chowder to gently simmer until the vegetables are tender, approximately 15 minutes.


    5) Strain 2 cups of the chowder solids through a sieve or finely-slotted spoon and reserve for later.  Add half of the green chiles to the chowder solids.

    6) Add the other half of the green chiles to the pot of chowder.

    7) Using an immersion blender or regular blender, puree the chowder until smooth.  (If using a regular blender, be careful when filling the blender with the hot chowder! Return the chowder to the pot once pureed.)

    8) Add the chowder solids back into the pot and bring the chowder to a boil.


    9) Remove the pot from the heat and stir in the yogurt and scallions.


    10) Season the chowder to taste with salt, pepper, and habanero sauce.

    If you like, you can choose to roast the ears of corn prior to adding them to the pot.  That should infuse a smoky flavor into the chowder.  You can also choose to puree the entire chowder, but I personally like that the chowder has chunks of corn and chile submerged in the puree.  Every spoonful of the chowder is creamy from the puree, but then your mouth realizes that there are itty-bitty morsels in there to munch on.  The corn is sweet, the chiles are tangy, and the scallions are mild and crunchy.  The heat from the habanero sauce is subtle, but it adds a little kick to the dish that would sorely be missed otherwise.  This chowder turned out to be more filling than I had initially anticipated but each mouthful was taken down with pure joy.

    Tuesday, August 16, 2011

    Bonnaroo Cupcakes (aka Chocolate Cupcakes with Espresso Malted Whiskey Frosting)

    I've had really poor "cupcake mojo" lately.  As in really, really poor mojo.  To give you a synopsis, these cupcakes were the result of 3 weekends of baking attempts.  I even made two batches of cupcakes last weekend, but nothing was working.  My cupcakes ended up either overflowing from the liners or deflating in the oven.  Then there was that one time I accidentally added an extra cup of sugar to the batter, but we won't talk about that.  Finally, after weeks of sucking at making cupcakes, I managed to pull out a dozen successful baked goods.

    I'm not getting carried away just yet, though.  I was actually trying to make 2 dozen cupcakes and only 12 made it out of the oven unscathed.  It's a start.  

    Side note #1: I just read an article about how the summer humidity makes baking absolutely unpredictable.  This is my excuse.  Seriously.

    Now we can get to the good stuff: my Bonnaroo cupcakes. They are fabulous.  And they were inspired by a Ben & Jerry's ice cream flavor.  Bonus.

    A few weeks ago, I was on my way home from my dance studio and I realized that I was hungry.  Of course I figured a pint of ice cream would be the perfect solution to this problem so I stopped at a local convenience store to check out the options.  And what did they happen to have?  Ben & Jerry's Bonnaroo ice cream.

    Bonnaroo.  What is it?  In a nutshell, it's an annual music festival held in Manchester, Tennessee.  Somehow Ben and Jerry have figured out how to capture the essence of the festival and everything Tennessee stands for in an ice cream flavor: "Coffee and Malt Ice Cream with Whiskey Caramel Swirl & English Toffee Pieces."  This already sounds like a cupcake flavor, right?  So I just made sure it became one...

    Side note #2: I'm sure Tennessee stands for a lot more than coffee, whiskey and malt flavors, but just go with it for now.


    Bonnaroo Cupcakes (aka Chocolate Cupcakes with Espresso Malted Whiskey Frosting)
    adapted from Hershey's "Perfectly Chocolate" Chocolate Cake recipe
    makes ~24 cupcakes
    Print Recipe

    • 2 cups sugar
    • 1-3/4 cups all-purpose flour
    • 3/4 cup cocoa
    • 1 1/2 teaspoons baking powder
    • 1 1/2 teaspoons baking soda
    • 1 teaspoon salt
    • 2 eggs
    • 1 cup milk
    • 1/2 cup vegetable oil
    • 2 teaspoons vanilla extract
    • 4 rounded tablespoons espresso powder
    • 1 cup boiling water
    1) Heat oven to 350°F. Place cupcakes liners in cupcakes tins.

    2) Add eggs, milk, oil and vanilla in mixing bowl.

    3) In another bowl, whisk together sugar, flour, cocoa, baking powder, baking soda and salt.

    4) With the mixer on medium speed, gradually add the dry ingredients to the wet ingredients in several increments. Mix ingredients together for another 2 minutes to blend completely.

    5) Dissolve the espresso powder in the boiling water.

    6) Stir the boiling water into the batter. The batter will be thin.


    7) Pour batter into cupcake liners. Fill cups 2/3 full with batter.

    8) Bake 22 to 25 minutes. Cool completely.

    Malted Whiskey Frosting
    • 6 tablespoons whiskey (such as Jameson)
    • 1 teaspoon espresso powder
    • 1 teaspoon malted milk powder
    • 4 - 5 cups confections sugar
    • 2 sticks (1 cup or 8 ounces) unsalted butter, at room temperature
    • ~24 miniature Heath bars (or ~6 regular-sized Heath bars)

    1) Whisk the espresso and malted milk powders into the whiskey. The powder will dissolve a bit, but not entirely. That is fine. Set this mixture aside.

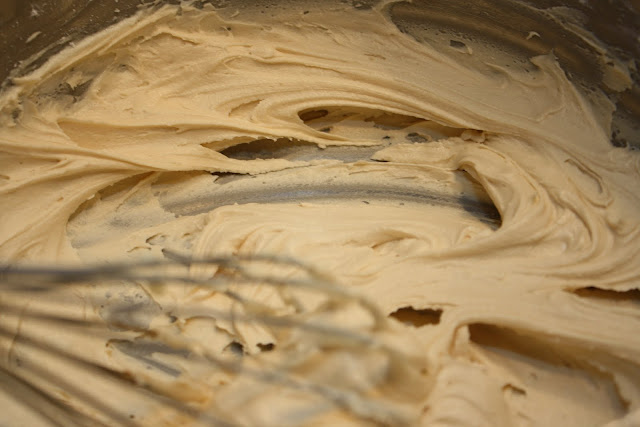
    2) Whip the butter using an electric or hand mixer for several minutes. You want the butter to look almost white and be very light and fluffy.
    3) Slowly add the powdered sugar, a few tablespoons at a time.

    4) When the frosting is thick, drizzle in the whiskey mixture. Whip until combined. If the frosting is too thin at this point, add another spoonful or two of powdered sugar.  If the frosting is still too thick, add more whiskey!

    5) Pipe or spread on the cupcakes.

    6)  Sprinkle Heath bar pieces on top of the frosting.


    I had excellent intentions of also adding a drizzle of caramel on top of the cupcakes, but in all honesty I totally forgot.  But you should get your caramel on.  Totally do it.

    I held back on the whiskey because I was taking these cupcakes to work, but if I was making them for friends I would have added another tablespoon or two.  I don't normally consume whiskey, but I've discovered that I love it in my desserts because it turns into a sweet, oak-y flavor when mixed into the frosting.  Add that to the espresso and malt flavors, along with the chocolate cake and the crunchy toffee and you have a pretty bangin' cupcake there.

    Monday, August 8, 2011

    Sausage-Cauliflower Spaghetti


    I've really been into pasta lately.

    Now let me drop some knowledge on you.  Pasta is not your friend in the summertime.  Why can't I understand that?  Oh, I can't.  I'm too busy eating pasta. I guess it didn't help that I bought more than 2 lbs of pasta from Flour City earlier this summer.  Hmmm...probably not the smartest move.  (My taste buds would disagree with that statement.)

    As I was flipping through one of my favorite recipe sources, a Sausage-Cauliflower Spaghetti recipe jumped out at me.  It was from one of my favorite sections of the Food Network magazine, which is Weeknight Cooking.  All of these recipes are relatively quick to whip up which pretty makes it appealing to me.  Lately I've been wearing myself down with the amount of time spent at work, working out, running errands, hanging with friends...Ok, I could go on but I'll spare you and just say that I needed to make this.  Now.

    Sausage-Cauliflower Spaghetti
    slightly adapted from The Food Network Magazine's recipe

    • 12 oz spaghetti
    • Salt
    • 3 tablespoons extra-virgin olive oil, plus more for drizzling
    • 12 oz Andouille sausage, casings removed
    • 6 garlic cloves, minced
    • 1 small head cauliflower, chopped into small florets
    • 1 bunch scallions, chopped (for me this equaled 6 scallions)
    • 1 1/3 cup grated Manchego cheese
    1)  Bring a large pot of water to a boil.  Add a handful of salt.  Pour in the spaghetti and cook until al dente, or to desired texture.

    2) Reserve two cups of cooking water, then drain the spaghetti.

    3) In the meantime, heat the olive oil in a large pan over medium-high heat.  Add the sausage and cook, breaking the sausage up as it lightly browns.  Cook the sausage until it is no longer pink.

    4) Clear a space in the pan and add the garlic . Cook until golden, 2 to 3 minutes.

    5) Add the cauliflower and cook until it starts to brown, about 2 minutes.

    6) Add 1 cup of the reserved cooking water, cover the pan, and reduce the heat to medium.

    7) Cook the mixture until the cauliflower is tender, about 5-8 minutes.

    8) Uncover the pan and boil over high heat until the liquid is almost evaporated.

    9) Add the spaghetti and scallions to the pan.  Drizzle with olive oil and season with salt.  


    10) Toss the pasta with the sausage and cauliflower for about a minute, in order to wilt the scallions and coat the pasta with the sauce.  Add the extra cup of cooking water, if a looser sauce is desired.

    11) Remove the pan from the heat, sprinkle with the Manchego and toss.  Drizzle with more olive oil, if desired.


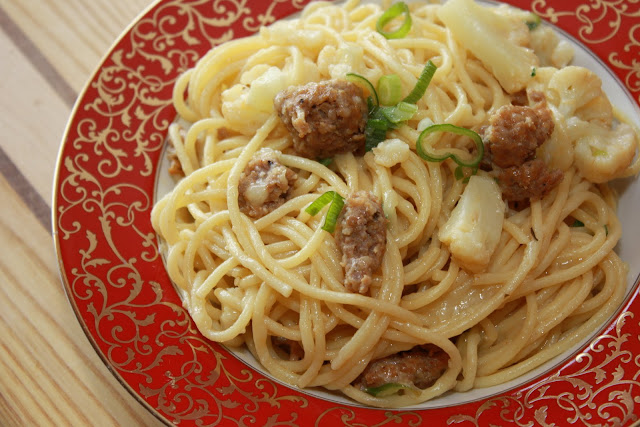
    I really didn't change much about this recipe.  It was quick and easy and that's exactly what I was looking for.  The recipe list wasn't crazy out of control either, which means that I could totally handle making this happen.  And it happened.  The combination of spicy sausage, tender and sweet cauliflower, and melted cheese all came together with the pasta and sauce to provide the perfect quick meal.

    Monday, August 1, 2011

    Indian Curry with Paneer

    Somehow, I missed it.  What, you may ask?  Only the first milestone in a blogger's online life: the 100th blog post.  If you can count (apparently I can't), you will see that this is the 103rd blog post on my site.  Which means that it has taken me weeks to even realize that I passed the 100th blog post.  So.  Happy 103rd post to me!

    What does this have to do with my  Indian Curry with Paneer recipe?  Nothing.  I'm just venting.  So let's get back to the food.

    I sort of stumbled across this recipe.  I had a block of paneer in the refrigerator that I needed to use.  After a web search for recipes, I came upon this one at allrecipes.com (the original recipe's link is below).  Since it sounded similar to other Indian dishes that I've made (and loved) in the past, I figured I'd give it a try.  Bonus points to this dish for allowing me to use those stray peas which were hanging around the freezer for a while.

    Side note here: I love a showy blog, with pretty pictures and the like.  But if the food sucks, then it's no good.  All Recipes usually doesn't have picture-perfect photos.  You're lucky if you see a photo of the food at all.  But that doesn't matter in the long run because I've never made a bad dish from this website.  Seriously.

    Indian Curry with Paneer
    adapted from All Recipe's Basic Indian Curry with Paneer recipe

    Print Recipe
    • 1/4 cup olive oil
    • 1 large yellow onion, chopped
    • 1 teaspoon minced garlic
    • 3/4 teaspoon grated ginger
    • 1/4 teaspoon ground ginger powder
    • 2 jalapeno peppers, finely chopped
    • 1/2 teaspoon chili powder
    • 3/4 teaspoon ground cumin
    • 3/4 teaspoon ground coriander
    • 3/4 teaspoon garam masala
    • 3/4 teaspoon ground turmeric
    • 1 (~14 ounce) can stewed tomatoes, pureed
    • 1 tablespoon ketchup
    • 14 oz paneer, cubed
    • 6 ounces frozen peas, thawed
    • 1/4 cup greek yogurt
    • 1/4 cup water

    1) Cube the paneer and place in a bowl of boiling water for 10-15 minutes. Drain the cubes and set aside for later.

    2) Heat the oil in a pan over medium heat.

    3) Add the onions and saute until lightly browned.

    4) Add the garlic and ginger and saute for another minute.

    5) Turn the heat down to low and add the jalapenos. Saute for another minute.


    6) Mix in the spices (chili powder, cumin, coriander, garam masala and turmeric).  Allow the mixture to cook for another minute.

    7) Stir in the pureed stewed tomatoes and ketchup.  Add about 1/4 cup water.


    8) Add the paneer and peas.  Allow the curry to simmer for 2-3 minutes.


    9) Stir in the greek yogurt.


    10) Increase the heat and let the curry come to a boil.  Cook for 3-4 minutes.

    11) Serve warm, over rice or with naan.


    This was the best paneer dish I've made so far.  I'm especially grateful, considering how the recipe was a complete leap of faith for me.  Way to go All Recipes.  In adjectives, this curry was spicy, tangy, smooth and creamy.  Does this make sense?  You don't get all those flavors/textures at once, but rather over the course of eating the dish, which is a pretty pleasant experience.  And I can't forget the peas, which I love.  I definitely need more peas in my life.  This will pretty much be my go-to curry dish from now on.  That is all.