First, I found out about sea salted caramels. I bought some and they ended up being pure amazing-ness in each bite. Wow. And now you're telling me that I can make these in a microwave?!?! Don't tease.
Here are the main reasons you don't see many candy- or caramel-related recipes on my blog:
1) I don't own a candy thermometer so I'm pretty much guessing how things are going when I'm standing over a pile of burning sugar. I do not suggest this approach.
2) I'm terrified of completely burning my face off (or any body part, really). See Reason #1.
But with this recipe, I thought I might actually have a chance at pulling it off. I decided to take one for the team, so to speak, and check out if this microwave-caramel-making claim is truly possible. And it is! It was so simple and easy that I almost couldn't believe it, even though the caramel was staring me in the face. Don't worry, I took several sample bites to make sure it was real. You know you should always taste test before providing treats, right?
Microwave Sea Salted Caramels
makes 24-40 caramels
- 1/4 cup butter, cut in 8 pieces
- 1/2 cup white sugar
- 1/2 cup brown sugar, firmly packed
- 1/2 cup light corn syrup
- 1/2 cup sweetened condensed milk
- 1 teaspoon vanilla
- Coarse sea salt
1) Using a microwave-safe bowl (at least 2 quarts), combine the butter, white sugar, brown sugar, corn syrup, sweetened condensed milk, & vanilla.
2) Stir everything together and place in the microwave, uncovered.
3) Turn the microwave on full power for 5-6 minutes (for soft & chewy texture) or 6-7 minutes (for firmer yet still chewy texture), stopping and stirring thoroughly twice during the cooking time (approximately every 2 minutes). Note that the recommended cooking times in this recipe are based on a 1100 watt microwave.
4) Remove the bowl from the microwave and stir until the caramel is well incorporated.
5) Pour the hot caramel into prepared pan or molds.
6) Prepare the pan/molds.
You have two options here:
a) Tray: Liberally coat 2 plastic mini ice cube trays with cooking spray. Allow the hot caramel to cool for 10 minutes after removing it from microwave. Use a spoon or a small scoop to fill sections of the tray. Place the tray in the fridge until firm (40-60 minutes). Invert the trays and twist and tap until the caramels fall out.
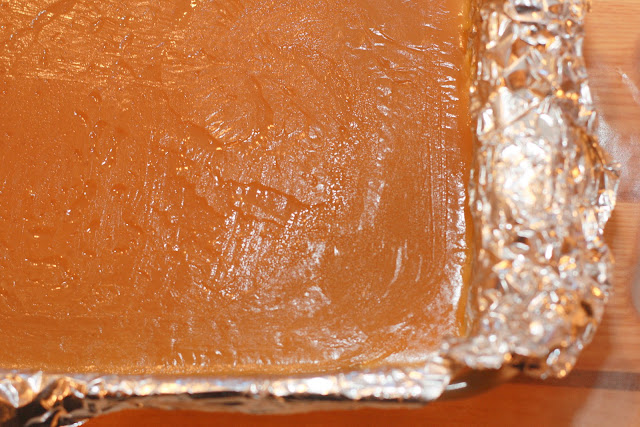
b) Pan: Line an 8x8 baking pan with aluminum foil. Liberally coat the inside with cooking spray before pouring in the caramel. Place in the fridge until firm enough to remove & cut (approx. 40-60 min). Pull up on sides of aluminum foil and remove the entire piece of caramel at one time. Place the caramel on a cutting board covered with parchment or waxed paper and cut into pieces of desired size.
I went with the Pan option. Here are my quick notes about this:
- We didn't have an 8x8 dish, so I used a 6x10 baking dish instead. All worked out well.
- Make sure to really coat the foil with cooking spray. If the caramel has excess cooking spray on it, you can always blot it away later with a paper towel. Not enough spray amounts to a lot of time spent wrestling the caramel away from the foil. (This tip also applies to the Tray method described above.)
7) Generously sprinkle coarse sea salt directly on top of the caramels.
That little scrap in the background is the cook's treat. Gotta keep myself happy somehow!
If you notice that your caramels are too hard, reduce the cooking time. If they're too soft, then increase the cooking time. Mine were a bit too soft for me, but my friend really liked this texture. Either way, the flavor was beautiful and vanilla-y. Yes, that's a word. If you want to kick things up a notch, you can also add a drizzle or two of chocolate. I ran out of time to do this, but that would be pretty awesome too.
To store the caramels, wrap them in parchment paper to package and/or share with friends. (Even if you're not going to, you can at least pretend that you're going to share them with others.) You can also layer them on top of parchment paper in a covered container. Place the caramel in the fridge or at a cool room temperature. If refrigerated, make sure to bring the caramels back to room temperature before indulging.


Hi Ellie!
ReplyDeleteI'm so sorry, I had your wonderful blog for this month's SRC, and for some reason my auto schedule for the post didn't work. My apologies. Loved your blog! http://www.heavenlytreatsandtreasures.com/2012/09/sea-turtles.html
No worries. Thanks. I hope you enjoyed the caramels!
DeleteI dropped my spoon inside the box while mixing the caramel at the last stage after taking it out of the microwave. It took me so long to get it out, and now my fingers hurt so much. But it tastes so good! Totally worth the pain.
ReplyDeleteOh no! I hope you are now OK! This caramel may be worth the pain though ;)
Delete